Replace your needle every 8–10 hours of actual sewing, or at the start of every new project — whichever comes first. A fresh needle costs almost nothing. A damaged bobbin case or hook race does not.
The 3-Phase Machine Mastery Protocol — The Full Home Servicing System
The exact system Mama Ologi used for over forty years. No special tools. No technical training. Just three clear phases that bring any machine back to life — and keep it there.
In Chapter 1, you uncovered something important: the machine is not your enemy. The real problem has always been a gap in knowledge — and now you are closing that gap, one chapter at a time.
You identified your own maintenance mistakes with the Self-Audit Checklist. That was honest, practical work, and it matters. Knowing where you have been going wrong is the first step. But knowing alone is not enough. You need a system that puts that knowledge into action.
This chapter gives you that system.
I call it the 3-Phase Machine Mastery Protocol. It is the backbone of this entire guide. Everything else we cover in the chapters ahead — the oiling, the weekly routine, the harmattan protection — builds on the foundation you are about to lay right here.
The three phases are simple: Reset, Restore, and Protect. Phase 1 clears away everything that is currently wrong. Phase 2 brings the machine back to the condition it should be in. Phase 3 is the ongoing habit that keeps it there.
Mama Ologi did not have a manual. She did not have YouTube. What she had was a sequence — a quiet, deliberate ritual she performed on her machine regularly. When I finally understood what she was doing beside that machine with her small cloth and her tin of oil, I realised it was exactly this: a reset, a restore, and a protect. In the right order, every single time.
Her machine ran for so long without a repairman.
You are about to learn why.
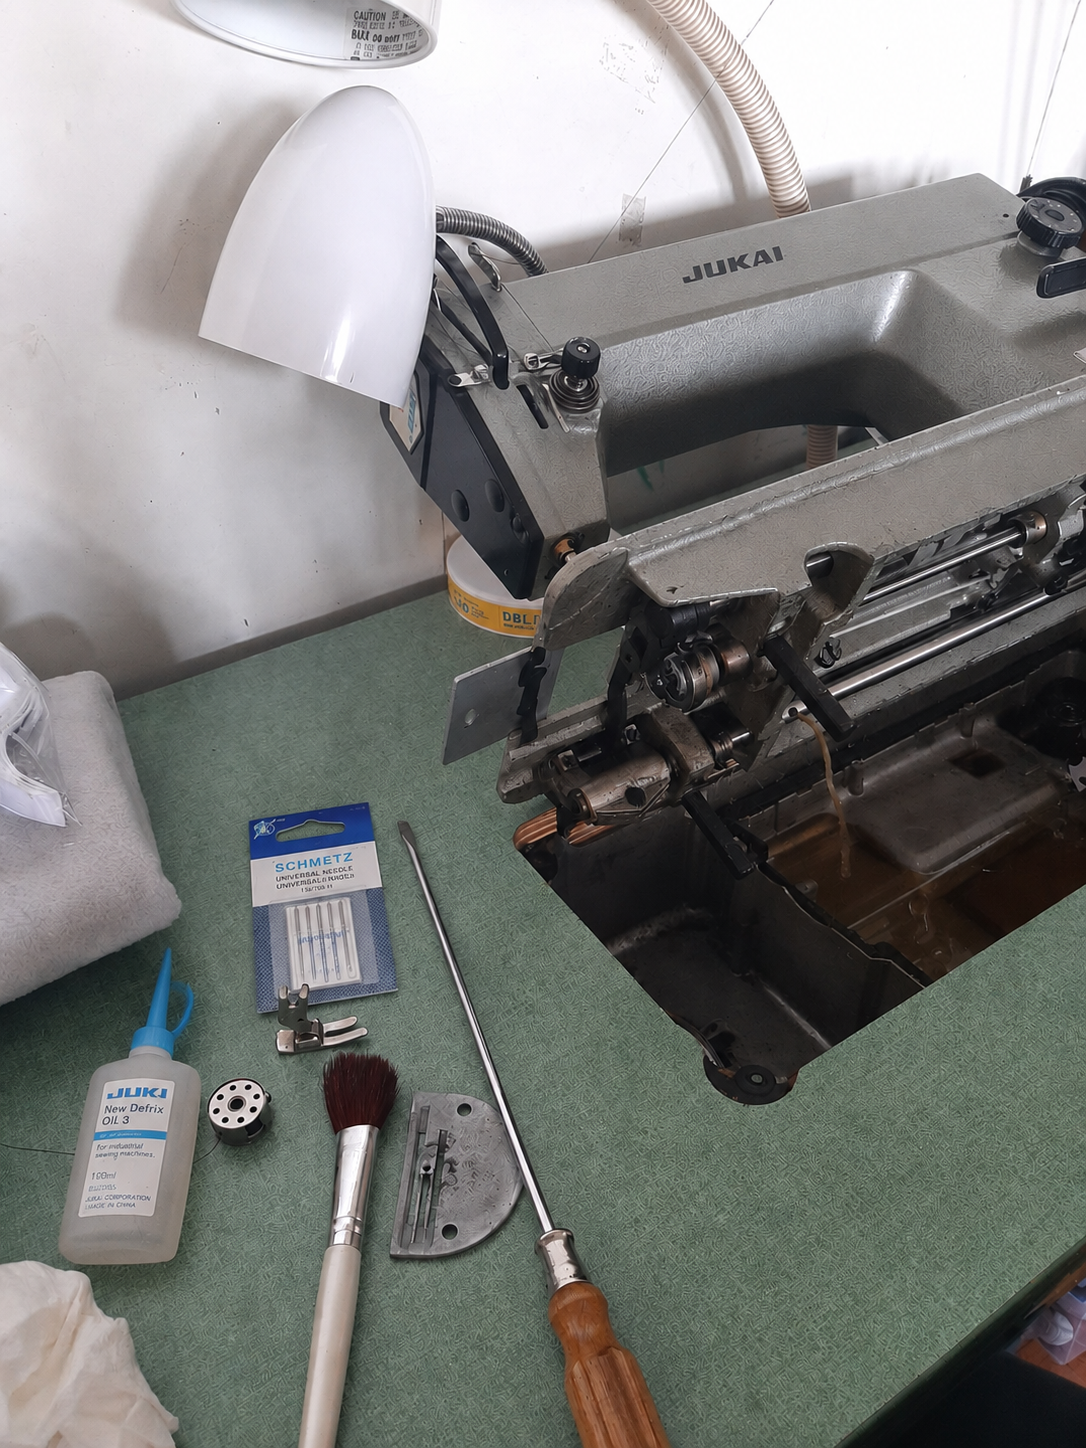
Think of the Reset as clearing the table before you cook. You cannot prepare a proper meal on a cluttered surface — and you cannot restore a machine that still has last week’s problems tangled inside it. The Reset removes everything: the old thread, the built-up lint, the dried grime around the bobbin area. All of it. You are giving the machine a clean slate before anything else.
This is also the phase most tailors skip. They pour in oil without cleaning first. They rethread without removing the jam. Then they wonder why the machine still misbehaves. The Reset teaches the machine — and your hands — a new standard of care.
STEP 1 Power Off and Unplug
Before your hands go anywhere near the machine, make it safe. Switch off at the power button and pull the plug from the wall socket completely. Do not simply turn off the power switch while the plug remains in the socket — that is not enough.
If you use a treadle or black head manual machine, simply take your leg off the pedal. There is no power source to disconnect unless you have an electric motor attached.
Good Habit
Machine off and unplugged before any maintenance begins. Not sometimes. Every time. This single habit protects both you and your machine from the kind of accident that cannot be undone.
STEP 2 Remove Fabric and All Tangled Thread
If there is fabric in the machine, remove it gently. If thread is tangled or jammed, reach for your small scissors and cut it. Cut cleanly, as close to the jam as possible, and pull the cut pieces out carefully in the direction they naturally want to travel.
What you must not do is yank. Pulling a jammed thread by force is one of the most common — and most costly — maintenance mistakes I see tailors make. A single hard pull can bend the needle sideways, scratch the delicate inner surface of the hook race, or crack the bobbin case. Parts that take ten seconds to damage can cost thousands of naira to replace.
If the thread feels stuck even after cutting, wait for Step 4. Removing the bobbin and opening the bobbin compartment will give you the access you need to free whatever remains.
⚠ Important
Never pull a jammed thread by force. A bent needle, a scratched hook race, or a cracked bobbin case are all consequences of one impatient tug. Cut first. Always cut first.
STEP 3 Remove the Needle Plate and Clear the Feed Dogs
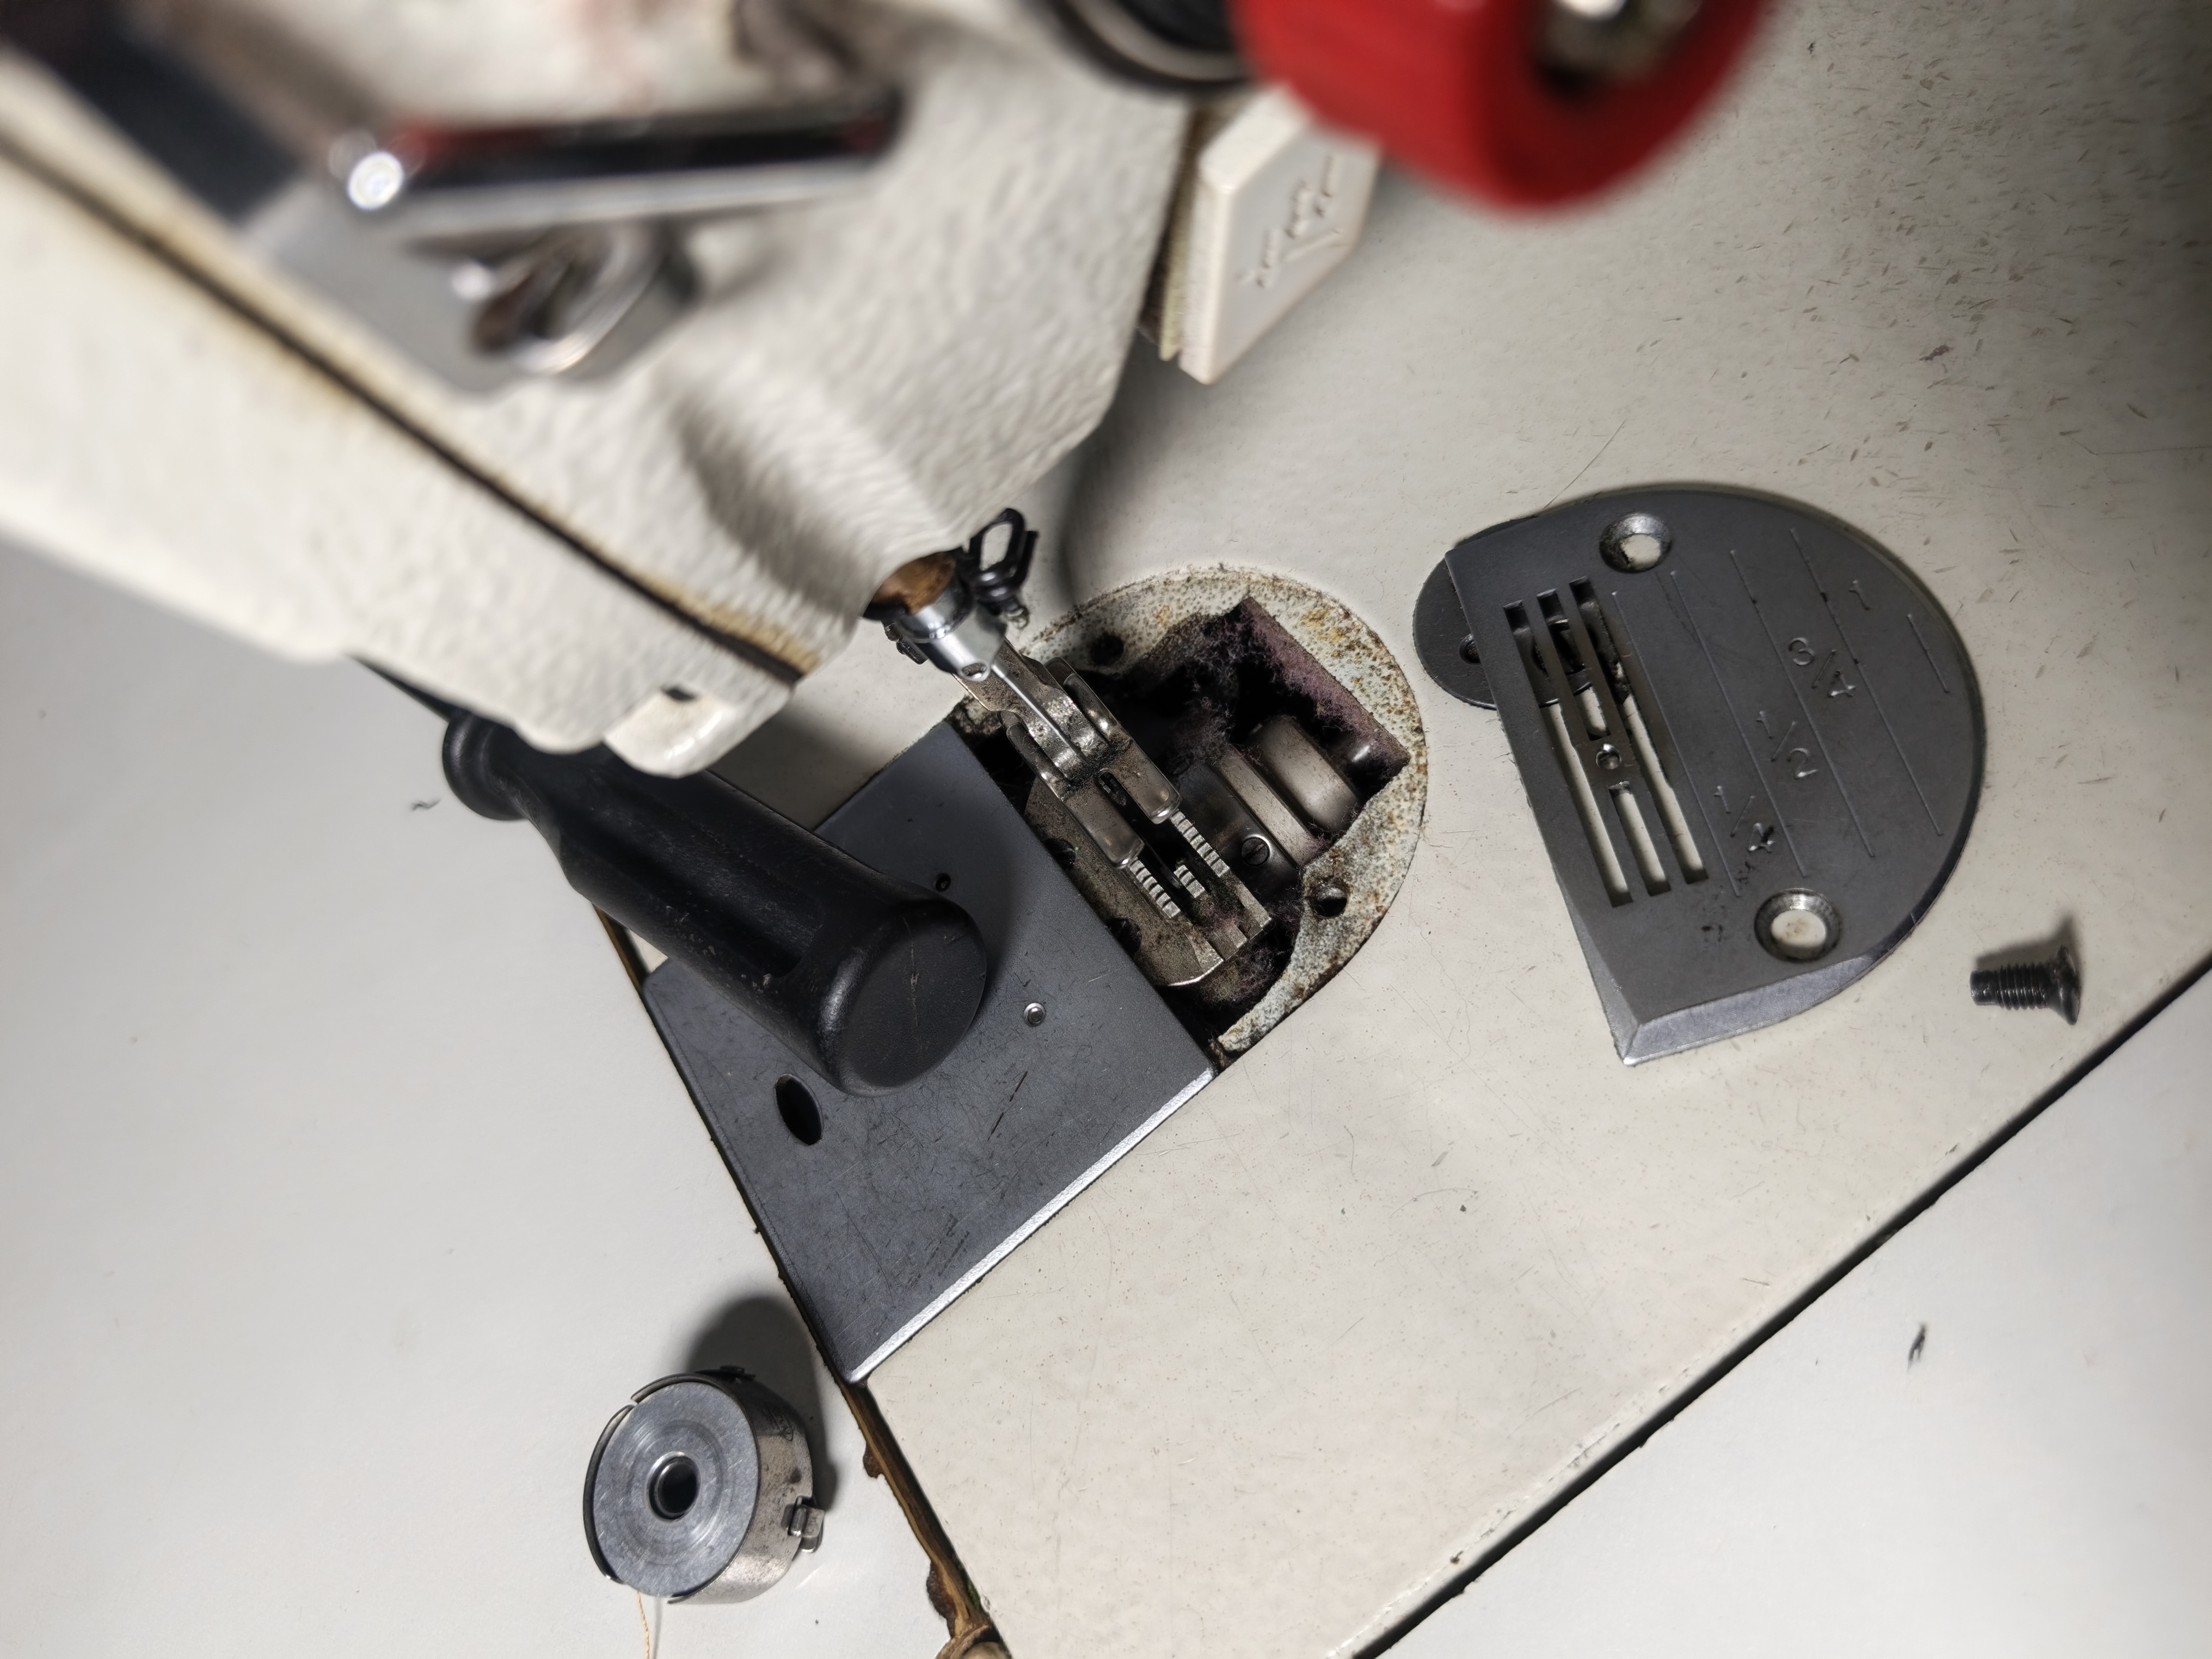
The needle plate is the flat metal piece directly below the needle, with a small hole through which the needle passes on every stitch. Unscrew it using the small flat-head screwdriver that came in the accessories box with your machine. On most domestic machines there are one or two screws — they come off easily.
With the needle plate removed, you will see the feed dogs: the toothed metal teeth that grip your fabric and push it forward stitch by stitch. Look at them honestly. What do you see? Most tailors, on first inspection, find them packed with thread debris, fabric fibres, and compressed lint. This is normal. It is also precisely why fabric sometimes refuses to feed properly, or why the machine vibrates more than it should.
Take the small brush that came with your machine — or a firm, clean toothbrush set aside only for this purpose — and sweep firmly. Brush with the direction of the teeth, not against them. Clear the feed dog grooves, the space around them, and every visible surface beneath the needle plate opening. Rotate the handwheel slowly by hand as you brush so the feed dogs move through their full range and all sides become accessible.
Machine Type Notes
Domestic electric machines: The needle plate may be secured differently — look for a side screw, or a plate that slides out of a slot rather than unscrewing. Check gently before applying any force.
Industrial machines: Feed dogs on industrial machines accumulate significantly more lint per hour because of their higher speed and volume of work. Be especially thorough here. Take your time.
STEP 4 Remove the Bobbin and Clean the Bobbin Case
Take out the bobbin case. On most domestic machines this clips out with a gentle pinch and lift. On treadle machines, it typically slides out of a circular housing.
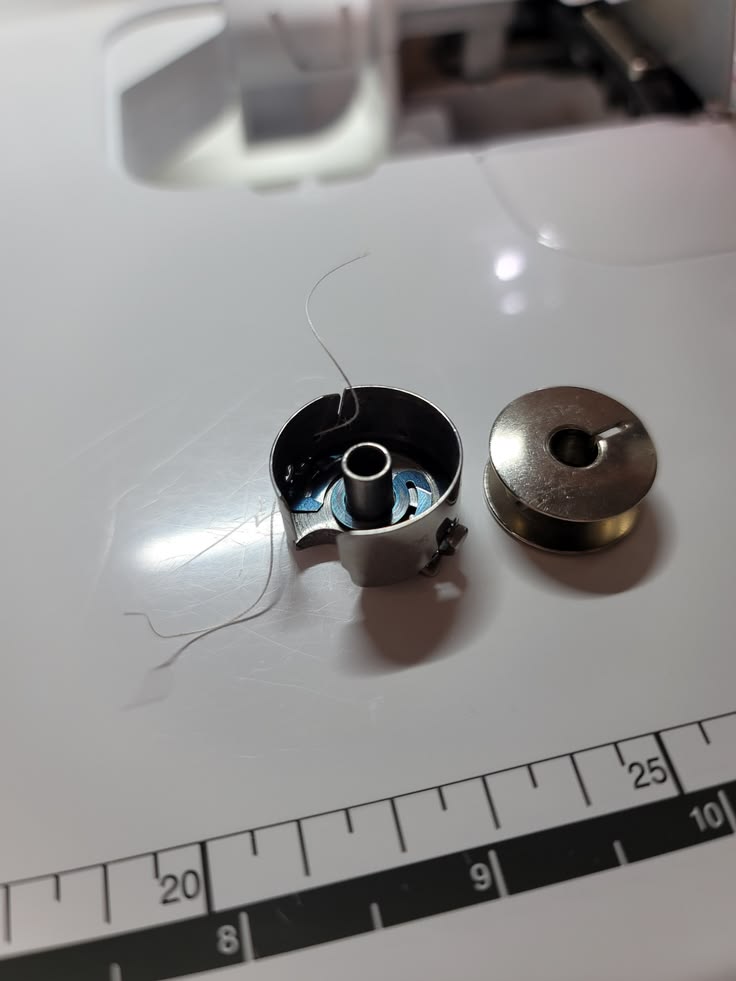
With the bobbin case in your hand, remove the bobbin and set it aside. Afterwards, examine the bobbin case carefully. Wipe the inside surface with a dry, lint-free cloth — a piece of old cotton fabric or a clean handkerchief works well. Pay close attention to the tension spring: the small, flexible metal clip on the side of the bobbin case that the thread passes beneath when loading. Run your finger gently along it. Thread becomes trapped here more often than anywhere else in the bobbin assembly, and that trapped thread creates tension problems that no amount of dial adjustment will fix — because the root cause is still sitting right there, unremoved.
While the bobbin case is in your hand, inspect it for cracks, chips, or rough edges along the rim. Run your fingernail slowly around the inside edge. It should feel perfectly smooth. Any roughness catches thread on every stitch, causing skipping and breakage. If roughness persists after cleaning, you need to replace it. A cracked or rough bobbin case cannot be cleaned back to health; it must be replaced.
Practical Tip
Hold the bobbin case up to a direct light source and look at the thread path from several angles. Thread that is invisible from one direction is often clearly visible — and removable — from another. A few seconds of careful inspection here saves hours of frustration at the machine later.
STEP 5 Inspect the Hook Race
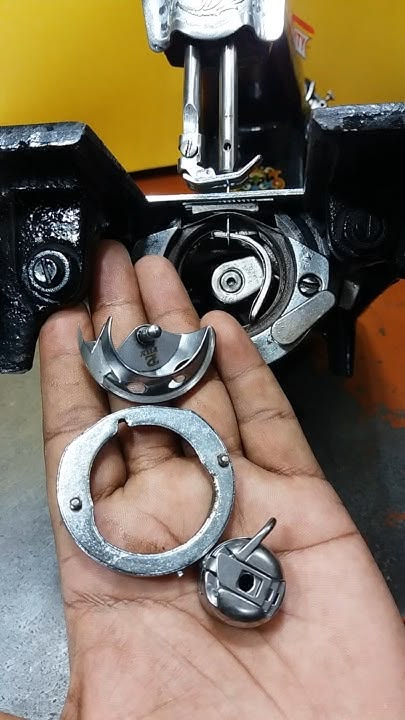
The hook race — also called the shuttle race — is the circular metal track that the bobbin case sits inside. It rotates as you sew, catching the upper thread loop and interlocking it with the bobbin thread to form each stitch. It is, in practical terms, the heart of your machine’s stitch-forming system.
With the bobbin and bobbin case now removed, you can see the hook race clearly. Take a clean, dry cloth and wipe it thoroughly all the way around. Then feel the surface slowly with a fingertip. You are looking — and feeling — for scratches, rough patches, or small metal burrs.
Why does this matter? Because every single stitch passes thread over this surface, thousands of times per hour. A smooth hook race lets thread glide freely. A rough one — even one with a single tiny scratch — snags the thread on each stitch, causing breakage, poor stitch quality, and eventually a bird’s nest jam. If the surface still feels rough after cleaning, you will need to replace it. It is not something to ignore especially if it is really rough. It can be the singular change that brings a sickly machine back to life.
STEP 6 Quick Oiling Check
This is not the full oiling session — Chapter 4 covers that in complete detail, with exact points, quantities, and a schedule calibrated for Nigerian conditions. But as part of the Reset, this is the moment to apply what I call the reset oil: a small, targeted application to the hook race that ensures the machine is not running dry as you move into the Restore phase.
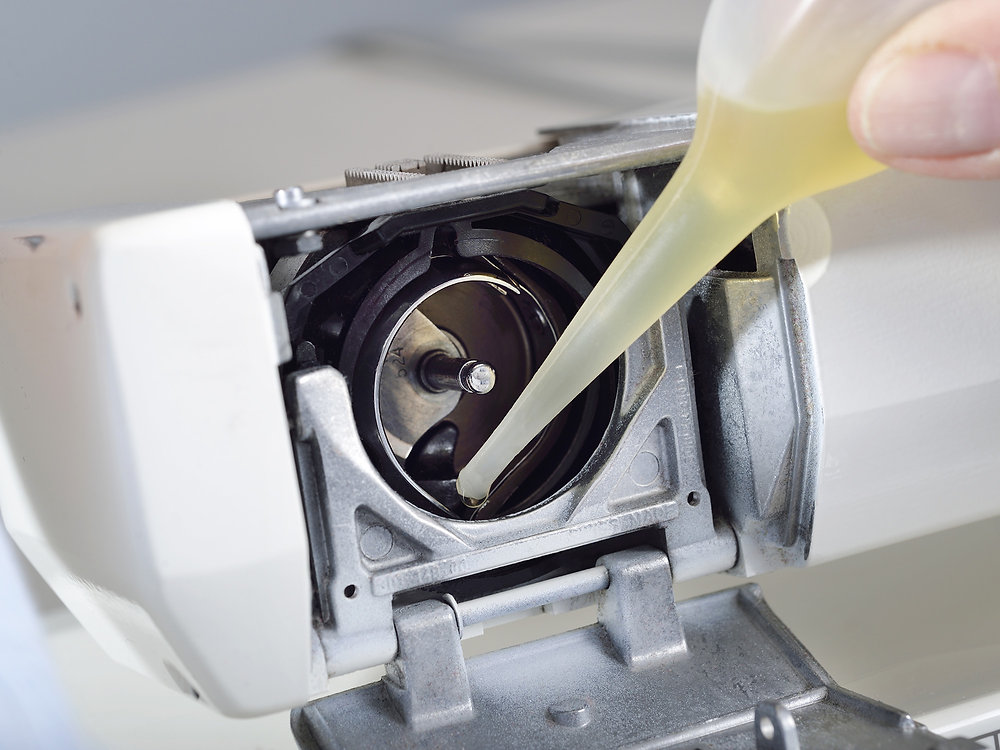
Apply one to two drops of sewing machine oil — only sewing machine oil, nothing else — directly onto the hook race track. Then rotate the handwheel slowly by hand six to eight full turns. This distributes the oil evenly around the circular surface. Before you continue, wipe away all visible excess oil with a clean, dry cloth. Any oil left sitting on machine surfaces will attract fresh lint and transfer to your fabric during sewing.
Industrial Machine Owners — Important
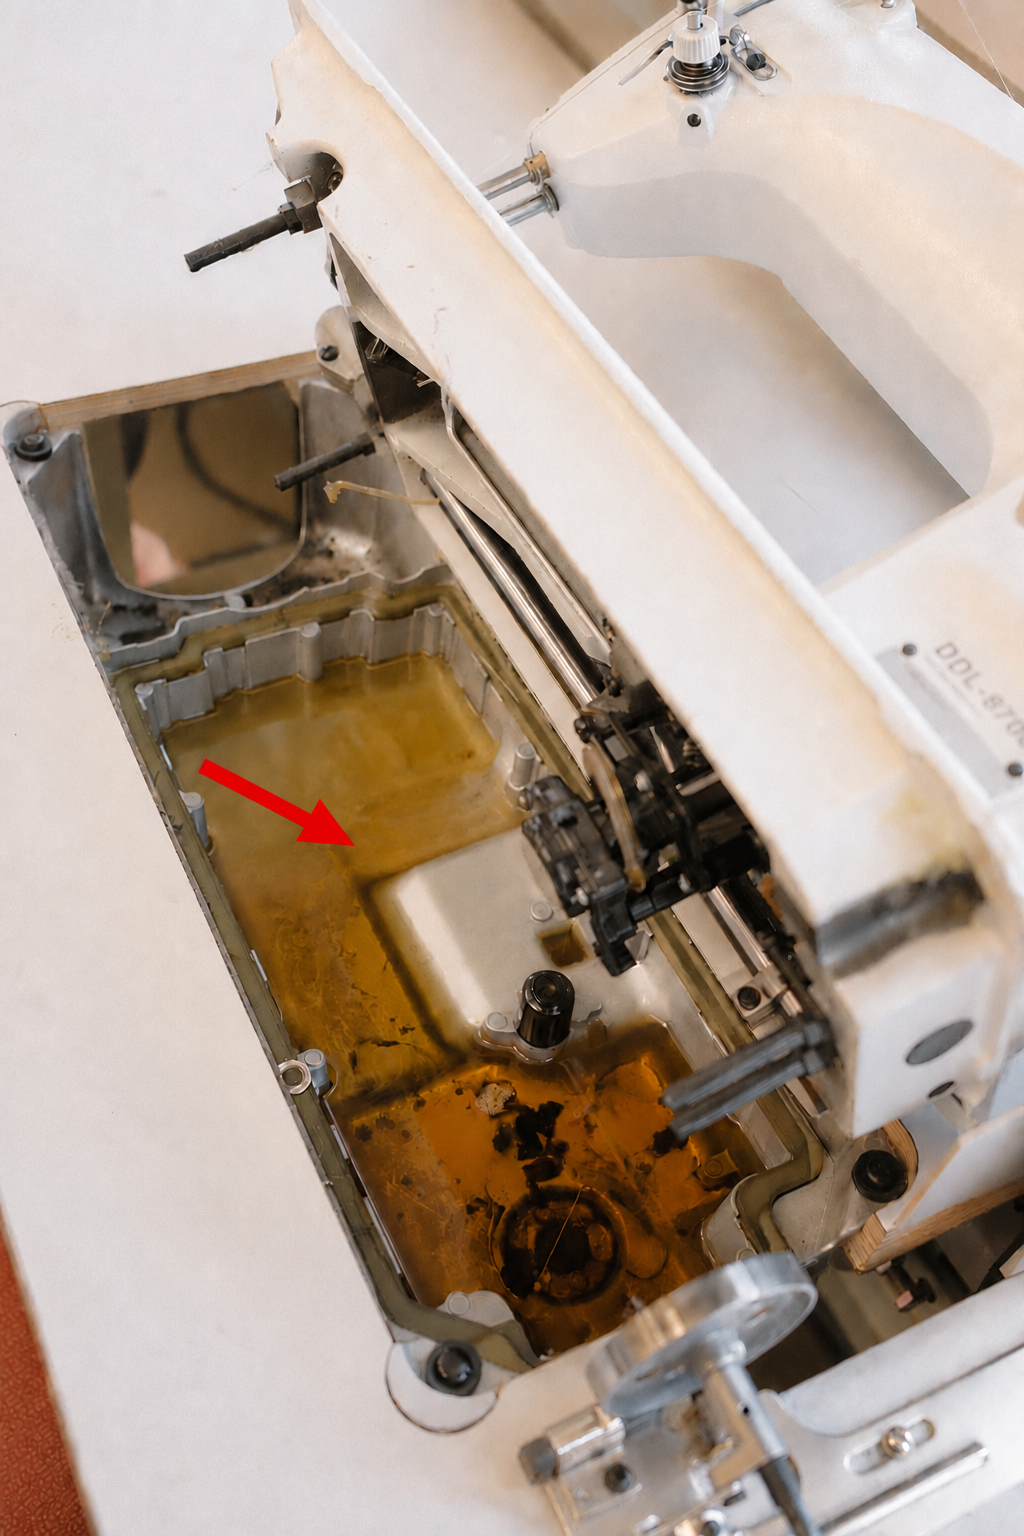
Industrial sewing machines (clutch motor, servo motor, or direct-drive) have an automatic internal lubrication system. They contain a built-in oil reservoir and self-lubricate during operation. You are not required to manually oil the internal parts of an industrial machine.
What you do need to do at this step: check the oil reservoir underneath your machine head, usually marked with minimum and maximum lines. If the level is approaching or below the minimum mark, top it up with sewing machine oil until it reaches the correct level (if the tank or oil is dirty, you will need to drain and clean it before refilling). Then continue with your bobbin area cleaning from Steps 4 and 5 above — lint and thread debris accumulate in the bobbin compartment of industrial machines just as they do in domestic ones, and the cleaning steps apply equally to both.
Phase 1 Complete
You have powered off the machine, removed all tangled thread, cleared the feed dogs, cleaned the bobbin case, inspected the hook race, and applied your reset oil. Phase 1 is done. Your machine is clean, clear, and ready.
Take a moment to look at what you just removed. All that lint, that trapped thread, that grime — that is what was silently working against your machine every single day. Follow the weekly routine in Chapter 5 consistently, and it will not build up like this again.
Phase 1 cleared the problems. Phase 2 returns the machine to the condition it should be in — a fresh needle, a correctly loaded bobbin, and a properly threaded upper path. By the end of Phase 2, your machine will be ready to sew.
Do not skip Phase 2 after completing Phase 1, even if the machine already seems to be running more smoothly. A machine that is merely clean is not the same as one that is working at its best. The Restore is what makes that difference.
STEP 1 Install a Fresh Needle
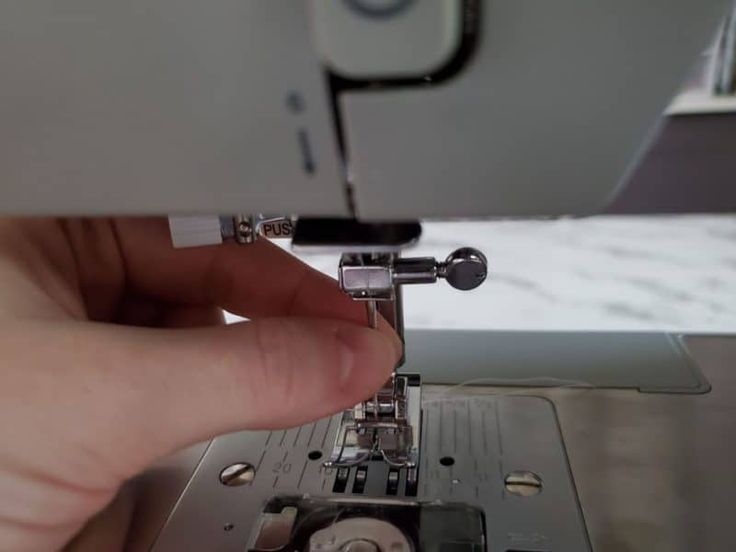
Before you thread a single guide, fit a new needle. This step is non-negotiable. A worn, blunt, or slightly bent needle is the cause of more sewing machine problems than almost anything else — and it is also the cheapest, fastest correction available to you.
How do you know when a needle needs replacing? Use this simple rule: if it has been in the machine for more than eight to ten hours of sewing time, or if you are starting a new project, change it. Do not wait for it to break. A needle does not have to snap in order to be causing damage. A slightly bent needle — one you may not even be able to see clearly by eye — creates a rhythmic clicking sound as it catches the bobbin case on every downstroke. That clicking is metal contacting metal on every single stitch. Left long enough, a bent needle damages the bobbin case — a part that costs considerably more to replace than a needle.
Needle size also matters for the fabric in front of you. Use a heavier needle — size 90, 100, or 110 — for thick fabrics such as Ankara in multiple layers, denim, or heavy canvas. Use a finer needle — size 65 or 70 — for lightweight fabrics such as chiffon or thin cotton. Using the wrong needle size for a fabric causes skipped stitches, thread breakage, and fabric damage that many tailors mistakenly blame on the machine itself.
Needle Replacement Rule
STEP 2 Reinsert the Bobbin Correctly
With the bobbin case cleaned and a fresh needle in place, it is time to load the bobbin. This step appears straightforward, but it is where many tailors consistently go wrong — and that single error carries forward into every stitch the machine makes.
First, check the bobbin winding. Hold the bobbin up and examine it. The thread should be wound smoothly and evenly, sitting flat and parallel against the spool with no loose sections, overlapping layers, or bunching on one side. Uneven winding produces inconsistent thread delivery, which causes stitch quality to vary from stitch to stitch and fabric to pucker. If your bobbin is unevenly wound, rewind it before continuing.
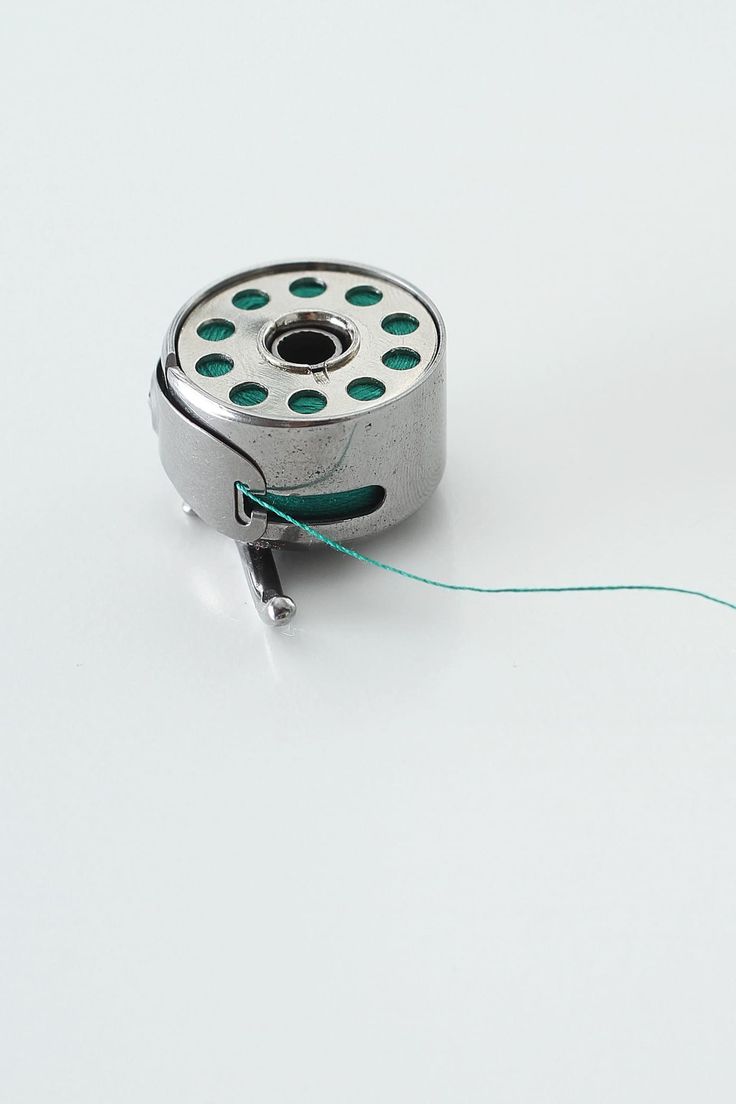
Next, confirm the direction of insertion. Most machines specify whether the bobbin should turn clockwise or counterclockwise when the thread is pulled — this direction determines whether the thread unwinds correctly as you sew. The correct direction is usually printed inside the bobbin compartment cover, or shown on a small diagram near the bobbin opening. Follow it precisely. A bobbin inserted facing the wrong direction is one of the most common causes of thread bunching beneath the fabric.
Once the bobbin is seated, pull the thread beneath the tension spring on the bobbin case. You should feel a gentle resistance as the thread passes under the spring, followed by a small click as it seats correctly. If you do not feel that resistance, the thread has missed the spring. Remove it, reposition, and try again. Correct engagement here is not optional — it determines whether the bobbin thread feeds with the right tension on every stitch.
Finally, push the bobbin case back into the machine firmly until you feel it click into place. A bobbin case that has not fully clicked home will vibrate loose during sewing.
STEP 3 Rethread the Upper Thread — From Scratch
This is the single most important step in Phase 2. Please read it carefully.
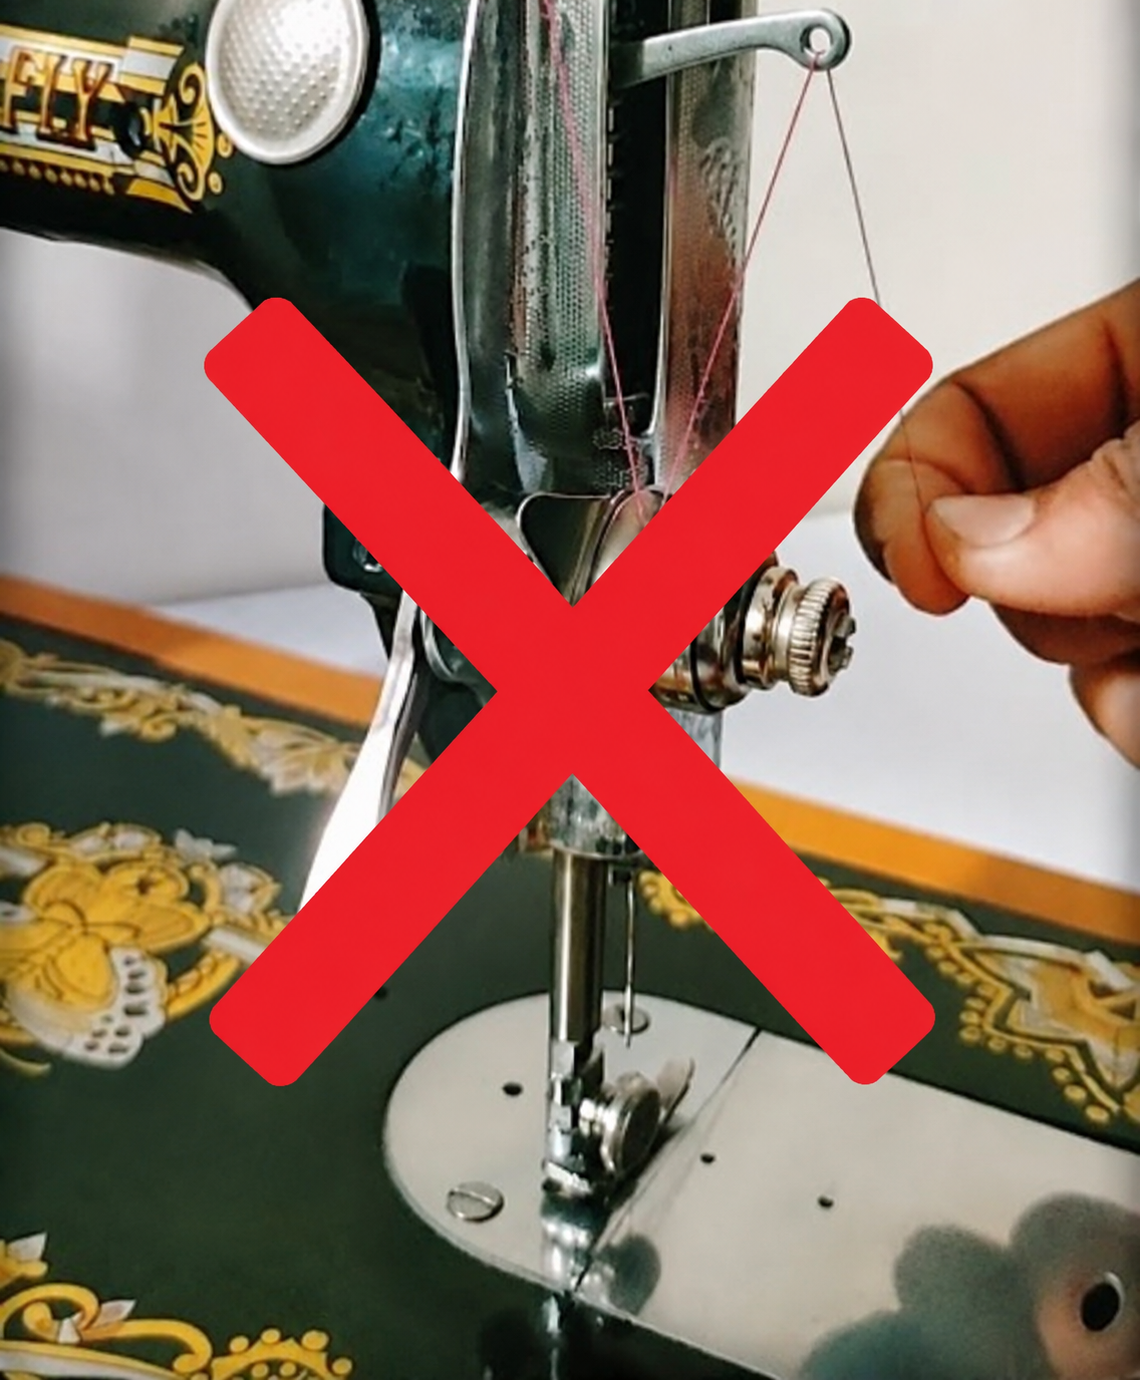
Before you touch a single guide, do one thing first: raise the presser foot. Not halfway. All the way up. This is the step that separates a correctly threaded machine from one that will cause thread bunching, tension problems, and jams — sometimes within the very first centimetre of sewing.
Inside your machine are two small metal plates called tension discs. These discs grip the upper thread as it passes between them, creating the resistance that controls upper thread tension. When the presser foot is lowered, the tension discs press together and close. Thread pushed between closed discs will pass through, but it cannot seat properly — it is not being held. The machine appears to be threaded, but the tension system is not engaged. Every stitch will reflect this: loose loops on the underside of the fabric, thread bunching, or breakage within the first few centimetres.
When the presser foot is raised, the tension discs open. The thread slides between them and grips correctly. This is why this one instruction — presser foot up before threading — resolves the majority of tension and bunching complaints in a single action.
⚠ Non-Negotiable
Raise the presser foot fully before threading the upper thread. Every single time. With the presser foot down, the tension discs remain closed and the thread cannot seat correctly. This one mistake causes more tension problems, thread bunching, and unexplained breakage than any other error in the threading process — and it costs nothing to correct except the habit of remembering to lift that lever first.
With the presser foot raised, thread the machine from scratch. Begin at the spool pin and follow every guide in the correct sequence without skipping a single point.
Threading Sequence
Upper Thread Path — Follow in This Order
- Spool pin — place the thread spool firmly on the pin so it cannot wobble during sewing
- First thread guide — the hook or guide at the top of the machine, usually to the left side
- Tension discs — draw the thread down and through the tension disc channel (presser foot must be fully raised for the discs to be open)
- Take-up lever — the moving arm on the front of the machine that rises and falls with each stitch; thread goes through the eye or hook in the lever from right to left, or as indicated on the machine
- Lower guides — one or two small hooks or guides between the take-up lever and the needle bar; do not skip these
- Needle — thread left to right through the needle eye, unless your machine specifies otherwise.
If you are uncertain about the exact threading path for your specific machine, the diagram is printed directly on the machine body — usually on the left front panel — or in the original manual. Follow whatever is shown there. The principle is the same across all three domestic machine types: start at the spool, follow every guide in sequence, and never skip a step.
Machine Type Notes
Industrial machines: The threading path on an industrial machine is longer, with more guides, and the presser foot lifter operates differently. However, the principle is identical — presser foot fully raised first, then rethread from the spool through every guide in the correct order without skipping any point.
Domestic electric machines: The take-up lever position and guide layout may look different from a black head machine, but the threading diagram printed on or inside your machine manual shows the correct sequence. Follow it from the beginning, every time.
STEP 4 Test on Scrap Fabric
You have cleaned, restored, and rethreaded. Now it is time to let the machine show you its work.
Lower the presser foot. Hold both thread tails — upper and bobbin — gently to the back or side so they do not loop under the foot on the first stitch. Sew ten stitches on a piece of scrap fabric, using something close in weight to the fabric you sew most regularly. Old cotton voile or plain cotton works well. Remove the fabric and examine both sides carefully under good light.
What you are looking for: even, balanced stitches on both sides of the fabric. The top should look the same as the bottom — no loops, no bunching, no thread pulling tighter on one face. Hold the fabric up to a light source. A correctly formed stitch looks identical from either side.
If the stitches are even and the machine sounds smooth: your machine is restored. You may begin sewing your actual work.
If problems persist after a correctly performed Reset and Restore: proceed to Chapter 3, the Re-threading Mastercheck. That chapter contains a step-by-step decision tree that will identify the specific fault and walk you through resolving it, without special tools and without a repairman.
Phase 2 Complete
A fresh needle. A correctly loaded bobbin. A properly threaded upper path with the presser foot raised first. Ten test stitches that look the same on both sides. Your machine is restored.
Do not rush past this moment. You just did what most tailors never do: you gave your machine the conditions it needs to perform at its best. This is what Mama Ologi did before she sat down to sew, every single time.
Phase 3 is not a set of steps you perform once. It is the habit that ensures you rarely need to perform an emergency Reset again.
You have just experienced the time and effort that goes into resetting and restoring a machine that has been allowed to accumulate weeks of problems. Phase 3 is the answer to a simple question: What do I do to stop this from happening again?
The Protect phase is built on three pillars. Each has its own dedicated chapter in this guide:
- The Weekly 5-Minute Routine — the preventive maintenance habit that stops up to 80% of faults before they start. (Chapter 5)
- The Correct Oiling Method — exactly where, how much, and how often to oil, calibrated for Nigerian heat and dust conditions, with a critical note for industrial machine owners. (Chapter 4)
- Harmattan and Dust Protection — the dry-season protocol that Nigerian tailors need and that no foreign guide ever mentions. (Chapter 6)
One Protect action you can take right now, today, before you reach those chapters: when you finish sewing, cover the machine. A breathable fabric cover — not plastic — placed over the machine before you leave your workstation. This single habit significantly reduces dust accumulation, which is the root cause of most grinding sounds, most jamming episodes, and most shortened machine lifespans in the Nigerian climate.
Chapter 6 will show you exactly how to make a cover that fits your specific machine from fabric you likely already have. Until then, any clean cloth draped over the machine is better than leaving it exposed.
⚡ Your Quick Win
Completing Phases 1 and 2 together takes approximately 25 to 35 minutes on your first attempt. With practice, the full Reset and Restore comes down to under 20 minutes.
In my experience working with tailors across Nigeria, those who perform the full 3-Phase Protocol for the first time consistently notice an improvement in machine sound and stitch quality before they have even read the rest of this guide. A quieter machine. Smoother handwheel rotation. Stitches that look even on both sides for the first time in months.
That improvement is not coincidence. That is what happens when a machine finally receives what it has needed all along.
🔨 Your Protocol Checklist
Phase 2 — The Restore
Phase 3 — The Protect
The 3-Phase Machine Mastery Protocol — Full Checklist
Use this checklist every time you perform the full Reset and Restore. Tick each step as you complete it. Do not skip steps, and do not move to Phase 2 until every Phase 1 step is done.
Phase 1 — The ResetStep 1: Machine powered off and unplugged from the wall (electric and industrial machines) or wheel brought to a full stop (treadle machines)
Step 2: Fabric removed; all tangled or jammed thread cut with scissors and removed — not pulled out by force
Step 3: Needle plate removed; feed dogs brushed thoroughly clean of all lint, thread debris, and fabric fibres using the machine brush or a firm toothbrush
Step 4: Bobbin removed; bobbin case removed and wiped with a dry lint-free cloth; tension spring checked and cleared of any trapped thread; inside rim of bobbin case checked for cracks or roughness
Step 5: Hook race wiped clean with a dry cloth; surface felt for burrs, scratches, or rough spots
Step 6 (domestic machines): 1–2 drops of sewing machine oil applied to the hook race; handwheel rotated 6–8 times by hand; all excess oil wiped away
Step 6 (industrial machines): Oil reservoir window checked; topped up with sewing machine oil if at or approaching the minimum level
Step 1: Fresh needle fitted — correct size for fabric; pushed fully up to the stop; clamp screw tightened firmly
Step 2: Bobbin confirmed evenly wound; inserted in the correct direction; thread pulled beneath the tension spring (resistance and click felt); bobbin case pushed firmly back into place until it clicks
Step 3: Presser foot raised fully before threading. Upper thread rethreaded from scratch in correct order: spool pin → first guide → tension discs → take-up lever → lower guides → needle. No step skipped.
Step 4: 10 test stitches sewn on scrap fabric; both sides inspected — even, balanced stitches on top and bottom confirm the machine is restored
Machine covered with a breathable fabric cover at the end of this sewing session
Day and time chosen for the Weekly 5-Minute Routine (Chapter 5)
Next oiling date noted or estimated (Chapter 4 provides the full schedule)
What You Have Learned in Chapter 2
You now know the complete 3-Phase Machine Mastery Protocol — the same systematic sequence professional technicians use when first assessing a machine. You know how to reset a machine from a state of accumulated neglect, how to restore it to proper working condition, and what the Protect phase requires of you going forward.
More importantly, you have moved from understanding to action. The checklist above is yours to use every time your machine needs a reset. The more you use it, the faster and more natural the sequence becomes — until it is simply how you care for your machine.
A Moment to Reflect
Before you move to Chapter 3, notice how your machine feels right now compared to when you began Phase 1. Rotate the handwheel slowly by hand. Listen. A machine that has just been cleaned, lightly oiled at the right point, and correctly rethreaded sounds and moves differently from one carrying weeks of built-up lint and dried thread. That difference — that quieter, smoother quality — is the sound of a machine that has been properly cared for.
You did that. Not a repairman. You.
The Protocol you have just completed is your foundation. But a well-maintained machine can still have a difficult day — and you will have them too. There will be mornings when the machine finishes the Reset and Restore and still misbehaves. Stitches bunching without warning. Thread snapping mid-seam on a Kaftan that was due yesterday. Fabric refusing to feed smoothly through a doubled Ankara hem.
When that happens, you will not need to call anyone. You will have a specific tool designed for exactly that situation — a ten-minute, step-by-step diagnostic that works without tools, costs nothing, and resolves the majority of machine faults on the spot.
That tool is waiting for you in Chapter 3.
In Chapter 3, you will learn the Re-threading Mastercheck — a rapid, systematic diagnostic that identifies the exact cause of a specific fault and guides you to fix it immediately, without guessing and without a repairman. If your machine is misbehaving right now, Chapter 3 may resolve it before the hour is out.