The Re-threading Mastercheck
Your 10-Minute Emergency Fix — No Special Tools, No Repairman, No CostThere is a customer waiting. She needs her Ankara dress by Friday evening. You sit down at your machine, you thread it, press the pedal — and the thread bunches underneath the fabric like a bird's nest.
You try again. Same thing. You tightened the tension knob. Try again. Worse. Your heart starts to beat a little faster. You begin to wonder if something has broken inside. You start calculating what the repairman will say. How many days you will lose. How much it will cost.
I want you to stop right there — because nine times out of ten, what I just described is not a mechanical problem. It is a threading problem. And a threading problem has a threading solution. One you can perform yourself, in ten minutes, for free, today.
That is exactly what this chapter teaches you.
In Chapter 2, you completed the full 3-Phase Machine Mastery Protocol — you reset, restored, and prepared your machine. If your machine is running well right now, this chapter gives you something even more valuable: a rapid diagnostic system you can return to any time your machine misbehaves in the future. Think of it as your emergency toolkit — always ready, always free.
If your machine is still giving you trouble after Chapter 2, or if it has started a new problem since you finished it, this chapter is likely to fix it today. More than half of all machine complaints I have seen in all my years working with Nigerian tailors have ended here: not with a repair, but with a correct rethread.
Why Rethreading Works — The Logic Behind the Fix
Before I show you the steps, I want to explain something that changed the way I understood this work. Many tailors feel that rethreading is too simple — that if the problem were really just threading, they would have noticed. But here is the truth: threading errors are almost invisible. They happen during a single moment of distraction. The thread slips out of one small guide. The thread wraps tightly around the spool pin. The bobbin goes in slightly the wrong way. None of these things is easily noticeable from the outside.
But the machine feels every single one of them, on every single stitch.
A sewing machine creates a stitch by looping the upper thread around the lower thread at a precise moment as the needle descends. For this to happen correctly, the upper thread must be under controlled tension — and that tension comes from a pair of small metal discs inside the machine called tension discs. These discs only grip the thread properly when the presser foot is raised. When the presser foot is down, the discs are closed. Thread loaded with the presser foot down usually lacks tension.
This single fact explains the majority of thread bunching that tailors experience every week. And it is completely correctable, without tools, and without cost.
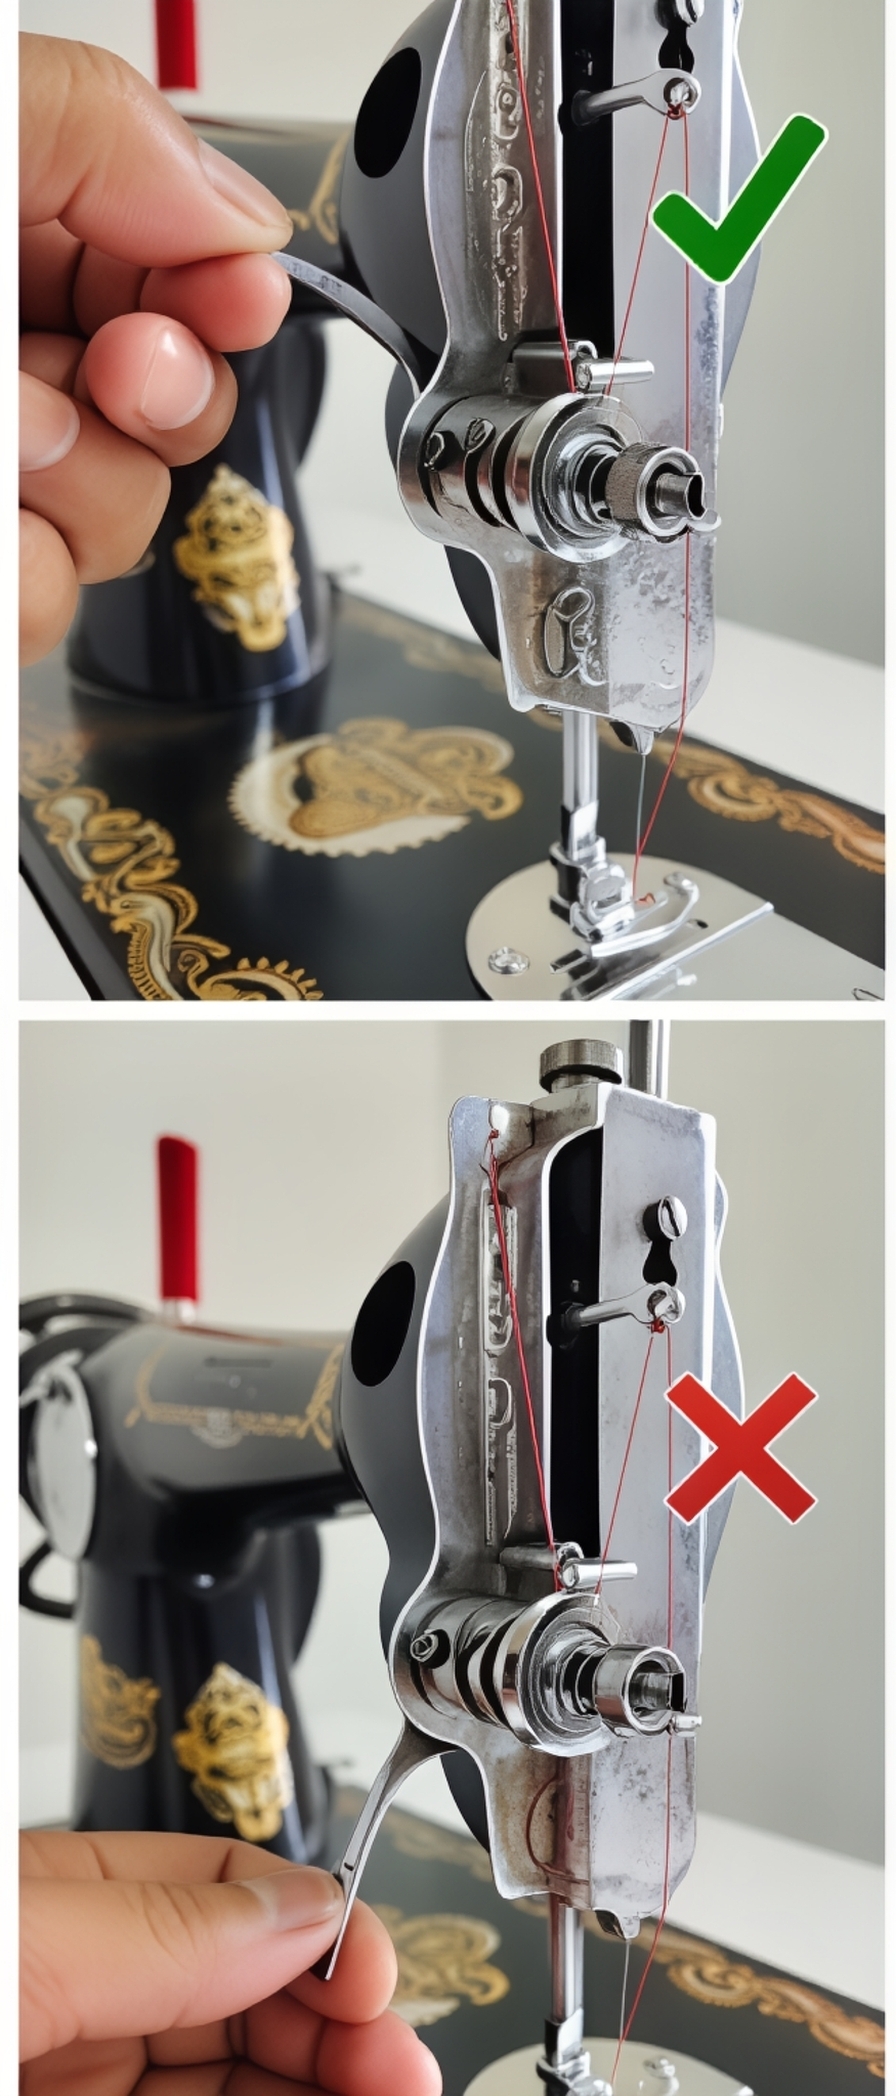
The same logic works in reverse when you need to identify a bobbin-side problem. When thread bunches on top of the fabric — the stitches look loopy on the surface while the underside looks fine — this is telling you something specific: the bobbin thread is not under correct tension. Either the bobbin is inserted in the wrong direction, the thread has not engaged the tension spring inside the bobbin case, or the bobbin case was not clicked firmly into position.
This is the first diagnostic rule to carry with you, and it is one of the most useful things in this entire guide:
Thread bunching on TOP of the fabric — this is a bobbin-side problem. Remove the bobbin and start there.
Thread bunching UNDER the fabric — this is an upper thread problem. The thread is not seated in the tension discs, or if it has, the tension discs are too loose, so need to be tightened. A full rethread with the presser foot raised is the first thing to do.
Once you know this, you can diagnose the source of most thread problems in seconds — before you even open the machine.
This is the kind of knowledge that would take years to accumulate on your own. But once you have it, it changes how you see every machine problem you will ever face.
The Seven Threading Errors That Cause the Most Trouble
Before we walk through the Mastercheck steps, I want to name the seven most common threading errors that cause machine problems for Nigerian tailors. Read through these carefully. You may recognise one — or more than one — that applies to your current situation.
If you recognised yourself in any of those errors — do not feel embarrassed. Every single one of them is something you should be taught, not something you are left to discover on your own. The fact that you now know them means they can never quietly cost you time and money again.
The Re-threading Mastercheck — Step by Step
This is the complete protocol. Follow it in order, every time your machine misbehaves. Do not skip steps, even if the machine was working fine just an hour ago. The Mastercheck works precisely because it is systematic — it eliminates every possible threading variable so that when you are done, you either have a machine that is running correctly, or you have confirmed that the problem lies elsewhere and Chapter 7 can guide you from there.
Total time: approximately ten minutes on your first attempt. With practice, six to eight minutes.
Before removing any thread, look carefully at what the machine is actually doing. Is the bunching on top of the fabric or underneath? Are stitches skipping? Is there a sound you have not heard before? Note the symptom — it tells you exactly which part of the threading path to pay closest attention to during the rethread. Use the decision tree in the next section to guide you.
Do not simply turn the tension dial without rethreading first. Adjusting tension on incorrectly seated thread solves nothing — it only adds a second variable to an existing problem.
Cut the upper thread at the spool and pull it completely out of the machine — through every guide, through the needle. Remove the bobbin case and bobbin. If the bobbin thread is tangled, unwind it fully. Start completely clean.
Do not simply re-run the existing thread or adjust it in place. Partial rethreading adds uncertainty to uncertainty. The Mastercheck works because you build fresh from a confirmed empty machine.
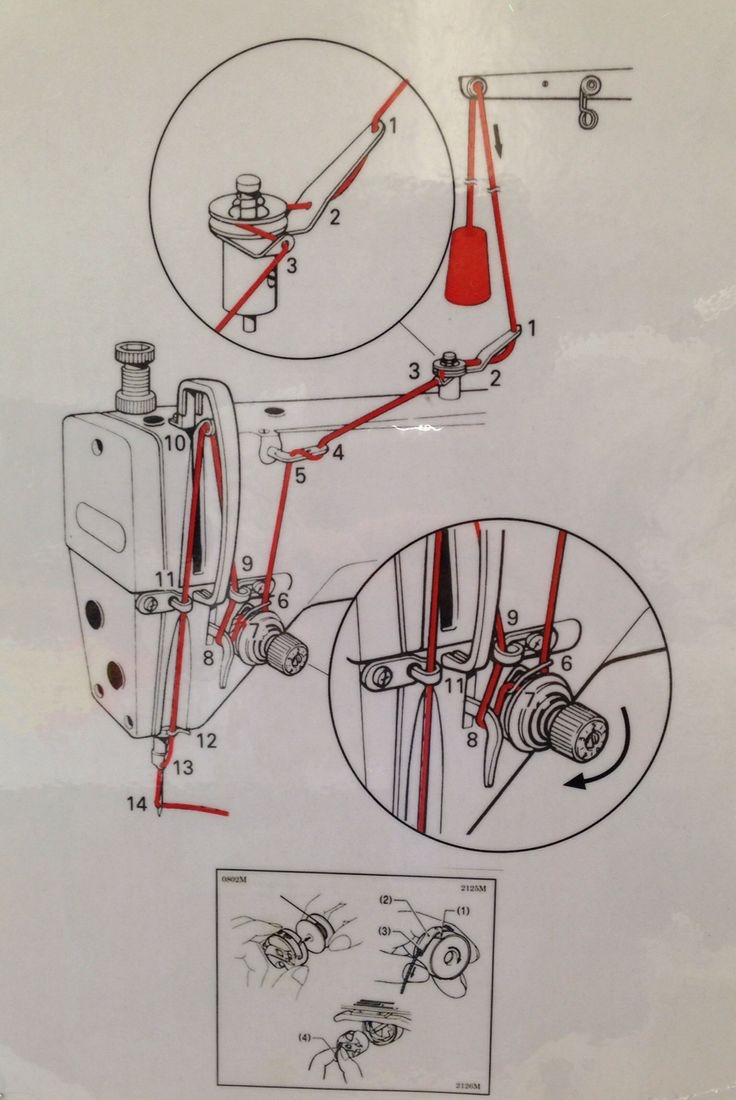
This is the single most important action in the entire Mastercheck. Before you bring a single centimetre of thread near the machine, raise the presser foot lever. On most machines, the lever is at the back right of the machine head.
With the presser foot raised, the tension discs are open. Thread loaded now will seat correctly between the discs.
From today, make this your first physical action every time you thread. Not the needle first. Not the bobbin first. Presser foot raised first.
Begin at the spool pin and move slowly through every guide your machine has: spool pin → first upper guide → into and through the tension discs → through the take-up lever → through the lower guides → through the needle eye, front to back.
If you are not certain of the correct guide order for your domestic electric machine, the threading diagram is printed on the machine body itself — usually on the left-hand side of the arm, or inside the top cover panel. Follow it exactly. Do not guess, and do not skip any guide even if it seems minor.
Take your time at this step. The stitches you sew for the next several hours depend on these thirty seconds of careful attention.
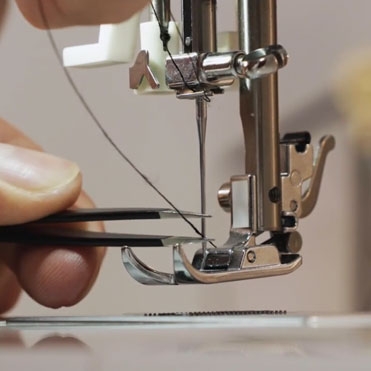
If the bobbin thread is running low or the winding looks uneven, wind a fresh bobbin before continuing. An unevenly wound bobbin releases thread at different speeds on different sides, making consistent tension impossible regardless of how well everything else is threaded.
Insert the bobbin in the correct direction for your machine. After inserting, pull the thread into the tension spring: the small metal clip inside the bobbin case. Pull gently until you feel the slight resistance that tells you the thread has seated. Then replace the bobbin case and press firmly until it clicks into position.
Test that the bobbin case is locked: push it very gently with one finger. A properly locked case does not move at all. A loose one wobbles slightly — if it does, remove and reseat it.
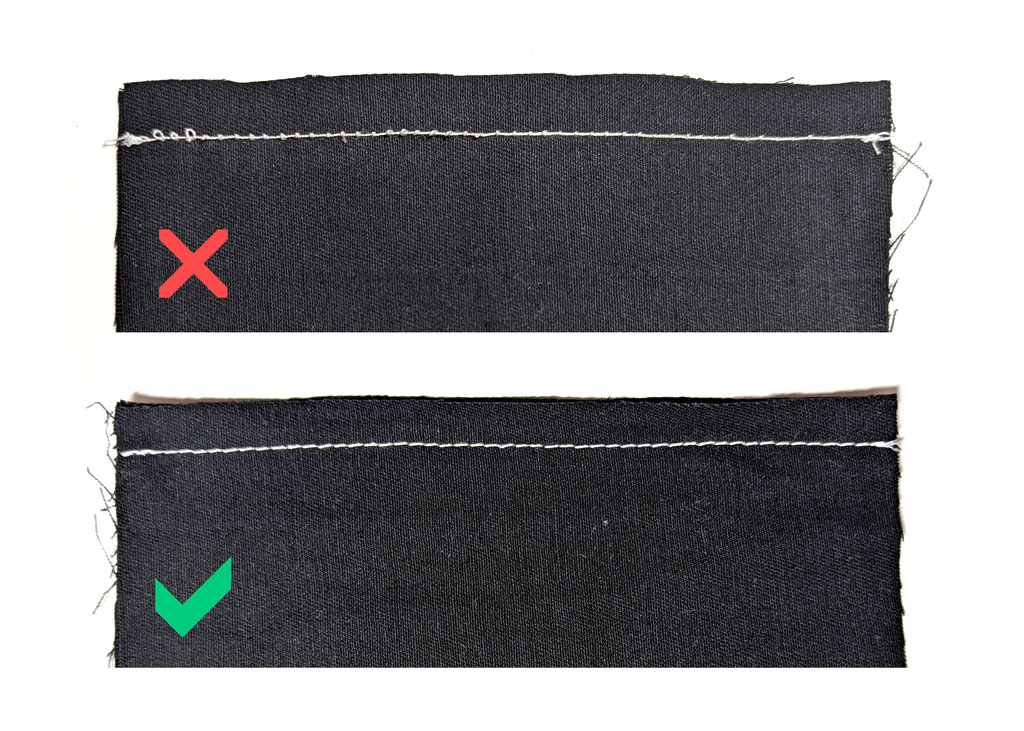
Cut a piece of scrap fabric of the same weight as your current work. Lower the presser foot. Hold both thread tails gently — the upper thread and the bobbin thread end you drew up through the needle plate. Sew ten stitches at a moderate, steady speed.
Remove the fabric and inspect both sides carefully in good light.
If the stitches look identical on top and bottom — neat, evenly spaced, no loops or bunching — the Mastercheck has resolved the problem. Return to your work.
If stitches are still irregular — use the decision tree below to identify the next step. The problem remains solvable; you now have more specific information to work with.
Symptom-to-Fix Decision Tree
This is the tool you will return to many times throughout your sewing life. Whenever your machine produces an unfamiliar problem, come here first. Match your symptom in the left column. The middle column gives the most likely cause. The right column tells you the first action to take.
Most problems resolve at the "First Action" column without needing to go further. Where an action references another chapter, that is your next step if the first action alone does not fully clear the fault.
| What You See or Hear | Most Likely Cause | First Action |
|---|---|---|
| Thread bunching on TOP of fabric — loops on the surface, neat underneath | Bobbin incorrectly inserted or thread not seated in tension spring | Remove bobbin; reinsert in the correct direction; confirm thread clicks into tension spring; confirm thread tension; confirm bobbin case locks firmly |
| Thread bunching UNDER the fabric — bird's nest underneath, neat on top | Upper thread not seated in tension discs, or at times, tension too loose | Full rethread from scratch with presser foot raised. Do not adjust the tension dial until you have done the full rethread. |
| Skipped stitches — every few stitches, one is missing or barely visible | Bent or blunt needle, OR threading error | Replace the needle first (if it has been in use more than a few days, replace it without question); then full rethread |
| Machine jammed — handwheel stiff or will not turn | Bird's nest of tangled thread in the hook race | Do not force the handwheel. Cut all visible thread, remove with scissors, and follow the Phase 1 Reset in Chapter 2 before rethreading |
| Rhythmic clicking sound — once per stitch, regular as a clock tick | Needle bent, striking the bobbin case on every stitch cycle | ⚠ Stop Immediately Do not sew another stitch. Replace the needle now. A bent needle will eventually crack or scratch the bobbin case or hook race — a costly repair that is entirely avoidable. |
| Squealing or high-pitched screech — a metallic protest sound | Metal running dry against metal — the machine needs oil | Stop sewing. Proceed to the Chapter 4 oiling protocol immediately. Continuing to sew through this sound causes damage. |
| Grinding sound — continuous, low, rough | Thread jam in the hook race, OR heavy lint accumulation in the mechanism | Phase 1 Reset from Chapter 2 — clear all thread, brush all lint from the bobbin area and feed dogs, apply oil to the hook race, then rethread |
| Machine will not sew thick fabric — skipping, struggling, thread breaking | Needle too fine for the fabric, OR upper tension too tight | Fit a heavier needle. Adjust the tension dial one notch at a time, sewing a test stitch after each change. |
| Thread breaking frequently mid-seam | Thread path obstruction, wrong/bad needle, rough spot on the hook race, or thread tension too tight | Full rethread first; inspect the needle for bending or burring; run your fingertip around the tip of the hook race slowly — feel for any rough patch. Tension dial adjustment should be done when all else fails |
| Stitches loose on both sides — thread barely holding on top and bottom | Thread missed the tension discs entirely during threading | Full rethread with presser foot raised; pay close attention to the tension disc section — the thread must pass between the discs, not around the outside of them. And the thread should have a bit of resistance when you pull through the discs |
When in doubt — rethread completely. From scratch. Presser foot up. Every guide. Every time. The Mastercheck takes ten minutes. A repairman visit takes days and costs money you should be keeping. The ten minutes is almost always the answer.
Machine Type Notes — Where Your Machine Differs
The Re-threading Mastercheck works for all three machine types used by Nigerian tailors. The principles are identical. The differences are in the physical path the thread travels and how the presser foot is operated. Here is what to know for your specific machine.
Your threading path is longer than on a domestic machine. Industrial machines typically have more guides, and the upper thread often travels further along the top arm before descending to the needle. The same Mastercheck principles apply exactly — but allow yourself more time to trace the full path, especially on your first attempt. Do not rush.
The take-up lever on black head machines is typically larger and more visible than on modern electric machines — which is actually an advantage when learning to thread. Make sure the take-up lever is at its highest position before you begin threading the needle. On most models, the upper thread passes through the take-up lever hook from the back to the front before continuing to the lower guides and the needle.
A Practical Note for Overlocker Users
Many Nigerian tailors use an overlocker — also called a serger — alongside their main sewing machine. Whether you have a large industrial overlocker or the smaller domestic type (often green, black or white), this section is for you.
The overlocker is a different machine from your straight sewing machine. It uses three or five threads simultaneously to create an edge stitch that sews, trims, and finishes a seam in one pass. Its threading path is more complex — and more unforgiving when something goes wrong. One misthreaded looper affects the entire stitch.
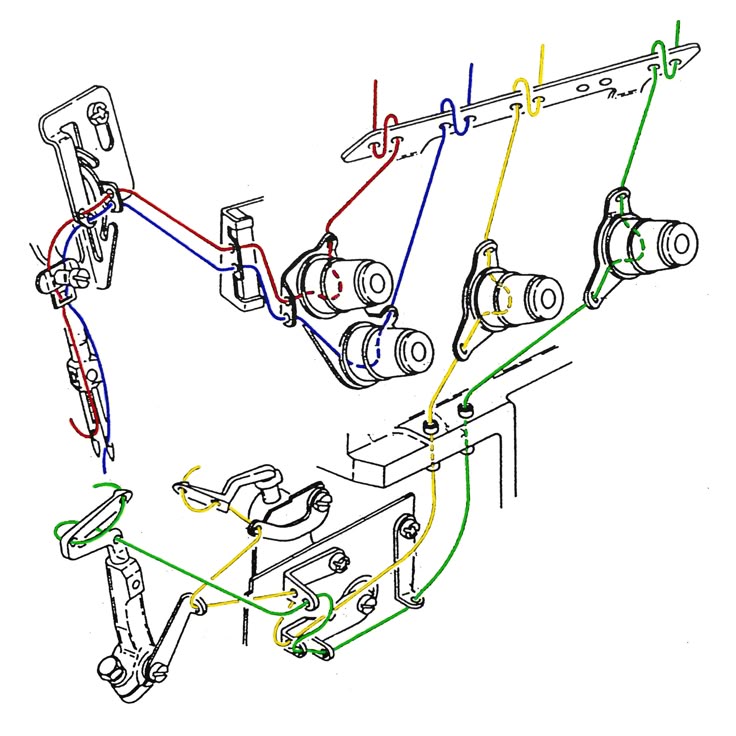
Three Points That Resolve Most Overlocker Problems
The "rethread first" principle that works reliably on your straight sewing machine applies directly to your overlocker. The same discipline produces the same results. Here are the three most important things to understand:
Your Action — Do This Today
Whether your machine is misbehaving right now or running perfectly, put this chapter to work before you move to Chapter 4.
Complete the following before you close this chapter:
- Identify your current symptom, if any. Write it down or mark it in the decision tree. Even "no current problem" is useful information — it means the Mastercheck now lives in your toolkit for the next time one appears.
- Run one complete Mastercheck on your machine. Remove all thread. Raise the presser foot first. Rethread the upper path slowly through every guide in order. Reinsert the bobbin in the correct direction, confirm the tension spring click, pull the thread to feel the resistance and lock the bobbin case. Sew 10 test stitches on scrap fabric and inspect both sides.
- If a problem was present — use the decision tree to identify the most likely cause and apply the first action. Sew another test stitch after each change.
- If your machine is running well — study those ten test stitches. Note how they look and feel. This is your reference point. The moment your machine deviates from this, the Mastercheck is your first response.
Think about the last time your machine gave you thread trouble. How long did you spend on it? How much of that time was spent turning the tension dial, pulling at thread, or quietly hoping it would sort itself out?
With the Re-threading Mastercheck, that same problem now has a name, a cause, and a sequence of steps that addresses it directly. You did not need different equipment. You did not need a repairman. You needed a method — and now you have one.
That is not a small thing. That is the beginning of a completely different relationship with your machine.
What You Have Learned and Built
- Why thread bunching on top of the fabric is a bobbin problem — and thread bunching underneath is an upper thread problem. You can now diagnose the source of most thread faults from the symptom alone.
- Why the presser foot must be raised before threading — and how this single step prevents the majority of tension problems.
- The seven most common threading errors, and which ones you may have been making without knowing.
- The complete Re-threading Mastercheck — six steps, ten minutes, no special tools, applicable any time your machine misbehaves.
- The Symptom-to-Fix Decision Tree — a tool you can return to whenever your machine produces an unfamiliar problem.
- Machine-specific guidance for industrial and black head treadle machines.
- Three key principles for overlocker threading problems.
You now have a diagnostic tool that many tailors who have sewn for twenty years have never been shown. The Re-threading Mastercheck resolves the majority of machine problems — and when it does not resolve the problem, it narrows down exactly what the true cause is. That information alone saves you time and money every time you use it.
But there is a category of problem that the Mastercheck cannot address — and it is one of the most common silent causes of machine failure in Nigeria. It is not visible. It does not produce an obvious symptom until the damage is already done. And it is caused by something almost every tailor in Nigeria has near her machine right now.
We are going to address it directly in Chapter 4.