Before You Begin
Know Your Machine
A Visual Reference — The Parts You Will Meet in This Guide
Before we get into anything practical, I want to give you something that will make your journey through this book easier — a simple picture of the parts we will be talking about throughout this guide.
You do not need to memorise any of this today. This page is not a test. Think of it the way you would think of the map at the front of a book — you may glance at it once when you start, and then you come back whenever you hit a name you are not sure about. That is all this is.
As you move through each chapter, I will mention parts by name. Some of those names will feel immediately familiar. Others may be words you have heard a repairman say, words that flew past you quickly, words you nodded at without quite knowing what they meant. That stops here.
By the time you finish this guide, these names will feel as natural as the parts of your own sewing room. Not because you sat and memorised a list — but because you will have used them, touched them, cleaned them, and oiled them so many times that they will simply become part of how you think about your machine.
✦ A Quick Word
Don't worry if these names feel unfamiliar today. By the time you finish this guide, they'll become second nature — because you'll be using them repeatedly throughout every practical exercise. Just keep this page open beside you whenever you need it.
Part One
The Three Machine Types Used in This Guide
This guide was written for the typical Nigerian tailor — which means it was written for three most used kinds of machines. Throughout the chapters, you will see notes flagging where instructions differ between them. Here is a list plus quick description of each one so you always know exactly which instruction applies to you.
| Machine Type | What It Looks Like | Key Fact for This Guide |
|---|---|---|
| Industrial Straight-Stitch Machine e.g. Emel,Two lion, Juki | A large standalone machine mounted on its own table, with a motor attached underneath — either a clutch motor or servo motor, or inbuilt (direct-drive). Built for continuous, heavy-volume sewing. | Has an automatic internal lubrication system. Do not manually oil the internal parts. You will check the oil reservoir window instead. Chapter 4 explains this in full. |
| Vintage / Black Head Treadle Machine e.g. Butterfly, Two lion, Brother, Singer treadle, older domestic models | The classic black-headed machine, usually on a wooden table with a foot treadle or hand crank for power. Fully mechanical — no electricity required except you attach an electric motor to the head. Extremely durable when properly maintained. | Requires manual oiling of all points — including 15–30+ small oiling holes along the arm and underside. Chapter 4 covers the full oiling map for this machine type. |
| Modern Tabletop Electric Machine e.g. Butterfly, Brother, Singer, Toyota, Janome | A compact machine that sits on a table and runs on a built-in electric motor. The most common type among part-time tailors. Lighter and more portable than the others. | Requires manual oiling of designated points. Fewer oiling points than a black head, but the same principle applies — correct oil, correct location, correct amount. |
Throughout this guide, illustrations may show one machine type. If yours looks different — that is perfectly fine. Each chapter flags where instructions differ between machine types. The core principles work the same way across all three.
Part Two
Key Parts Glossary — The Parts You Will Meet in This Guide
Every machine looks a little different, but these parts do the same job across vintage, domestic, and industrial machines. Scan this table once now, then come back to it any time a part is mentioned and you want a quick reminder of what it looks like and why it matters.
| Part Image | Part Name | What It Is | Why It Matters in This Guide |
|---|---|---|---|
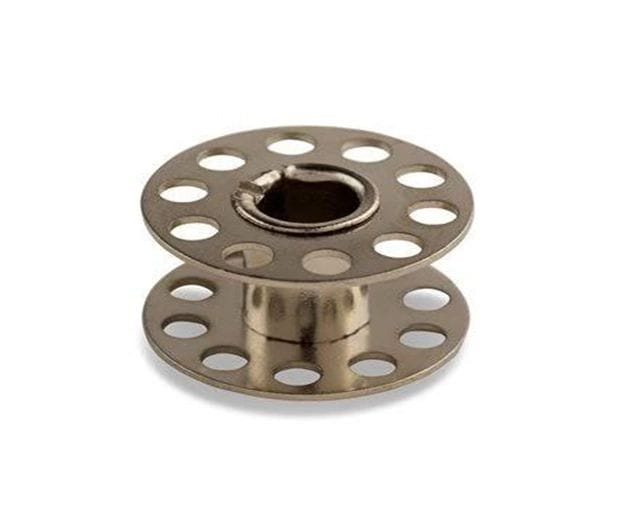
Bobbin |
Bobbin Also called: Reeler All three types |
A small spool that holds the lower thread inside the machine. It sits inside the bobbin case, underneath the needle plate, and works together with the upper thread to form each stitch. | You will check and reinsert this correctly during the Phase 1 Reset and the Re-threading Mastercheck. Bobbin direction is one of the most common causes of thread bunching. → Chapters 2 & 3 |
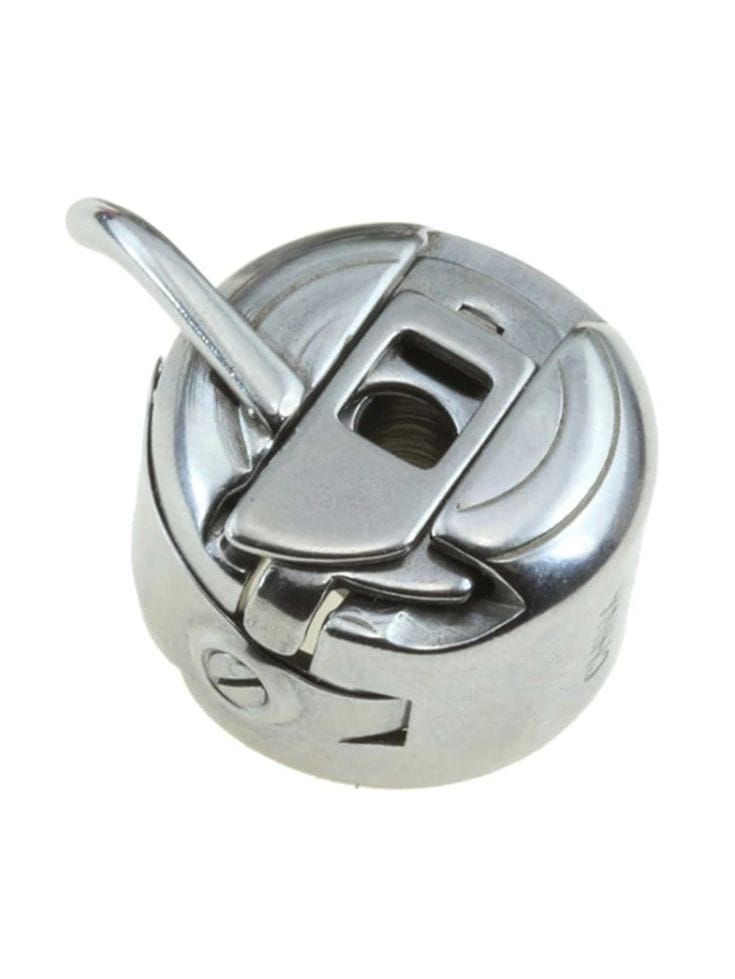
Bobbin Case |
Bobbin Case Also called: Shuttle All three types |
The metal housing that holds the bobbin in place while the machine sews. It has a small tension spring that the thread must click into correctly. A cracked or damaged bobbin case causes persistent thread problems. | You will remove, wipe, and inspect this during Phase 1 Reset. A thread caught in the tension spring is a very common hidden fault. → Chapters 2 & 3 |
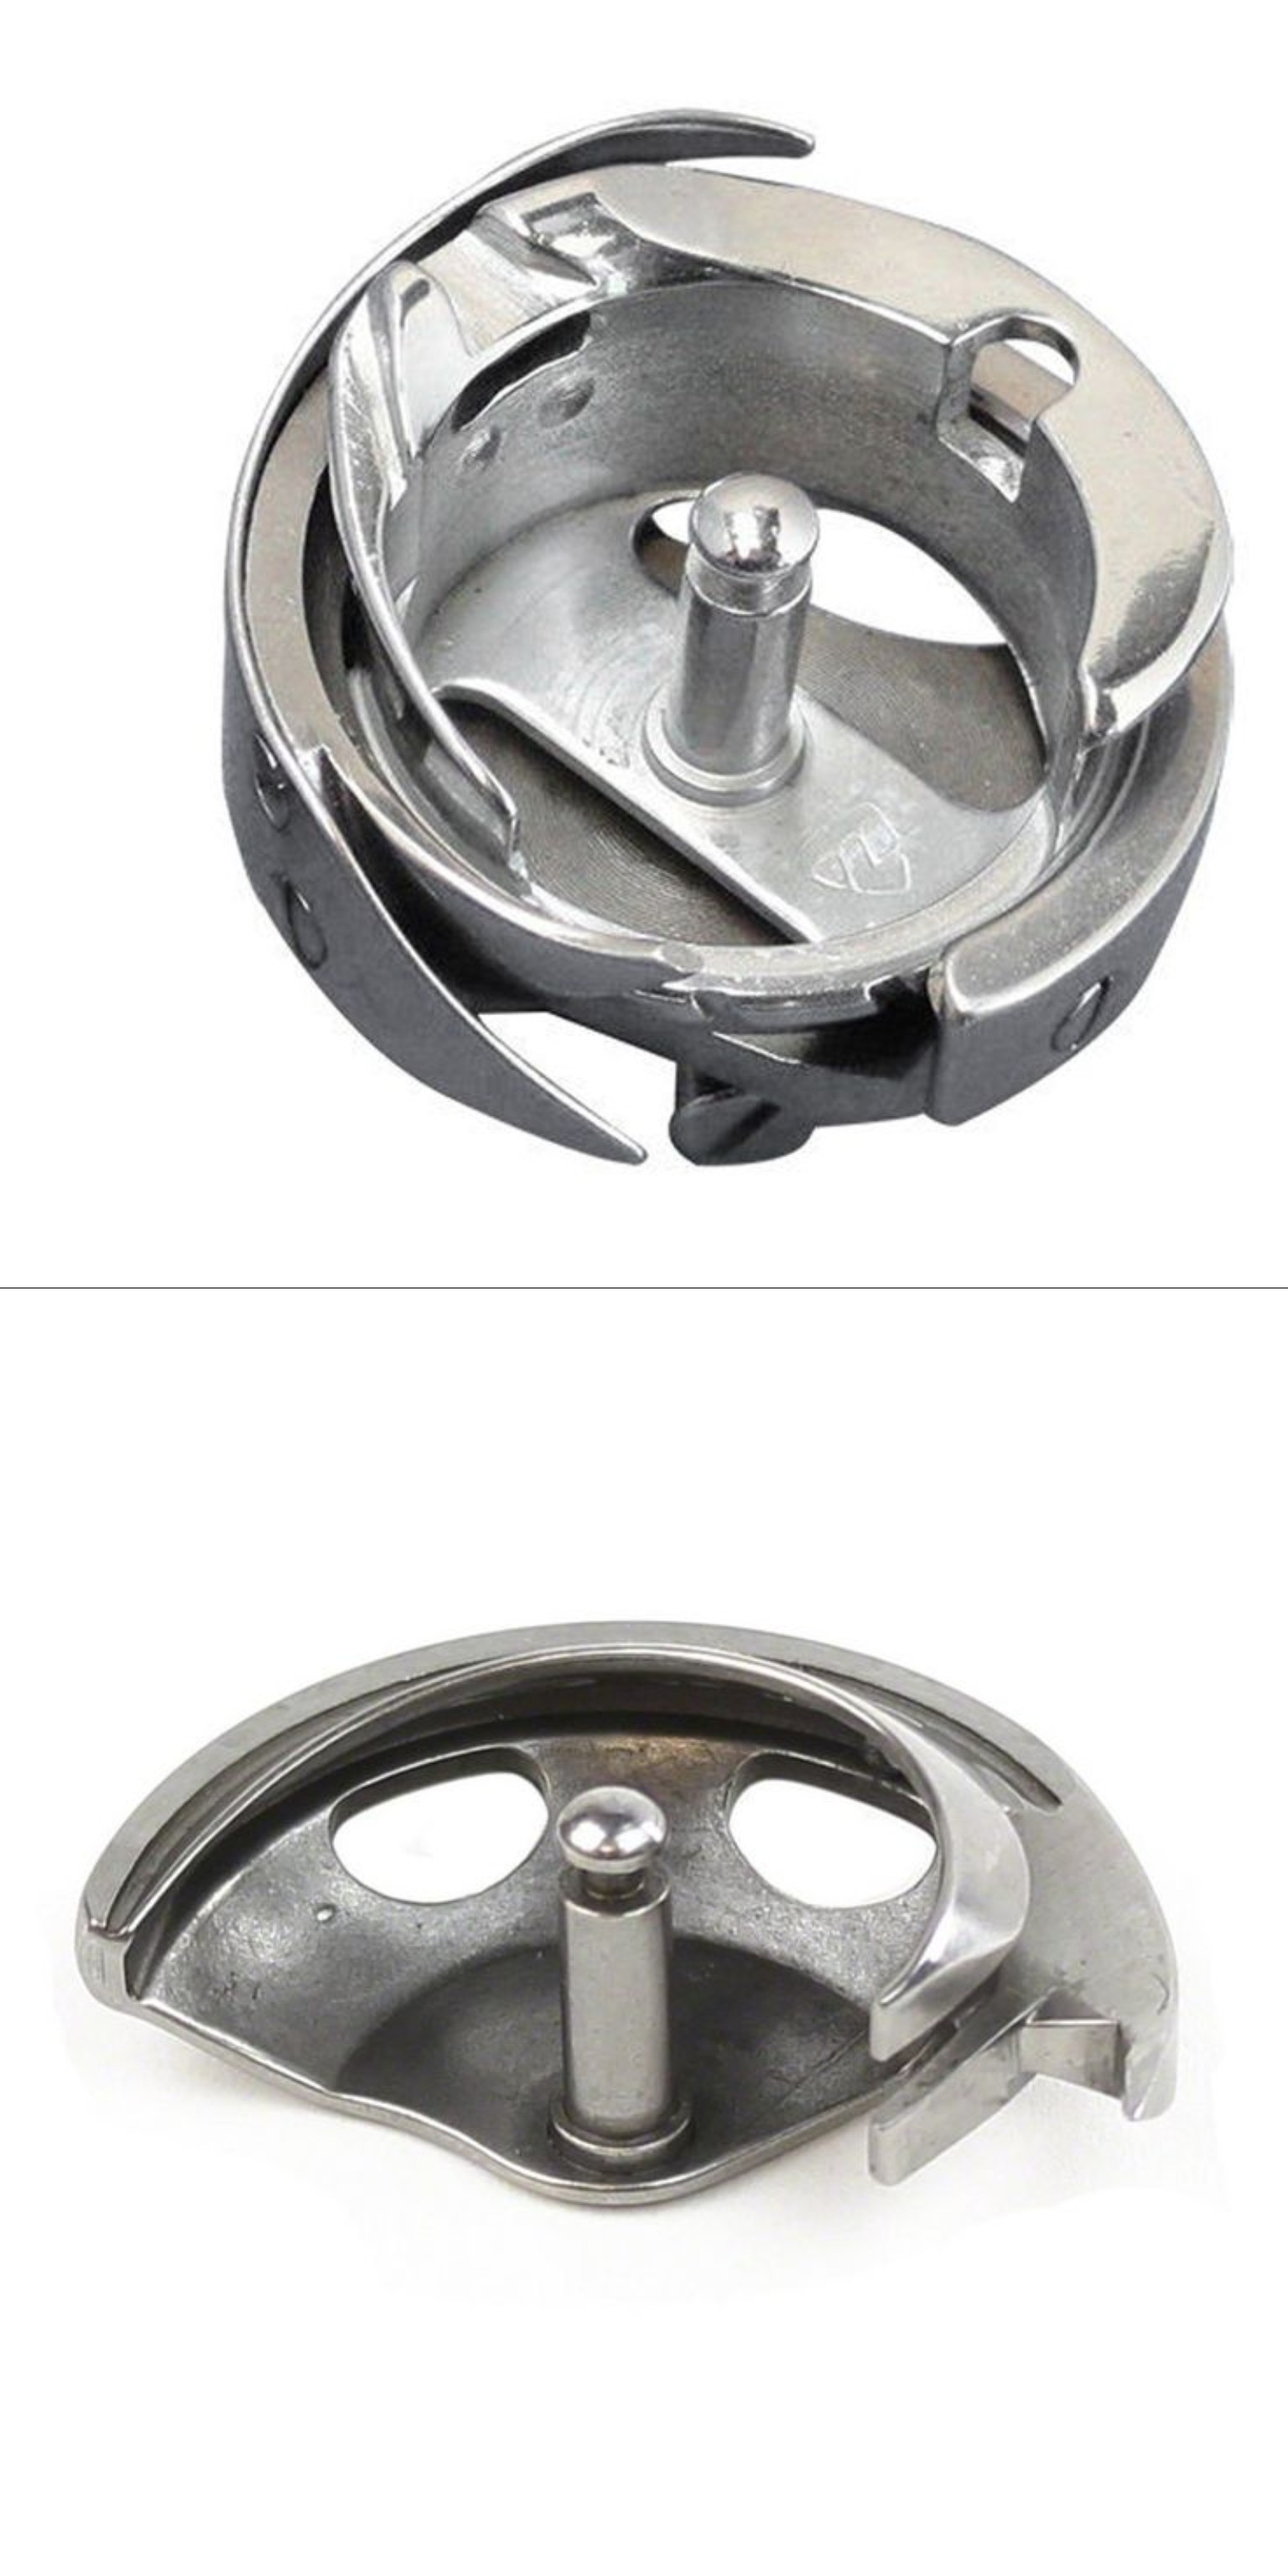
Hook Race |
Hook Race Also called: Shuttle Race, Shuttle Hook All three types |
The circular metal track around which the bobbin case rotates. This is where the upper thread and lower thread meet and interlock to form a stitch on every single movement of the needle. It is the heart of the stitching action. | The most important oiling point on the machine. Also the place where thread jams cause grinding sounds. You will clean and oil this in the Phase 1 Reset and again in Chapter 4. → Chapters 2, 3 & 4 |
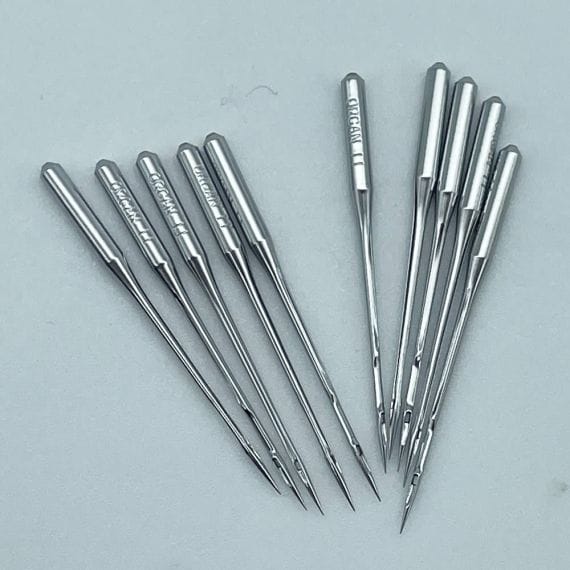
Needle |
Needle Replace after every sewing project All three types |
The thin metal pin that carries the upper thread down through the fabric to meet the bobbin thread below. Needles become blunt or bent with use and must be replaced regularly — this is one of the most ignored maintenance step. | A bent needle causes the rhythmic clicking sound many tailors mistake for a serious fault. You will fit a fresh needle at the start of Phase 2 and check it in the decision tree. → Chapters 2, 3 & 8 |
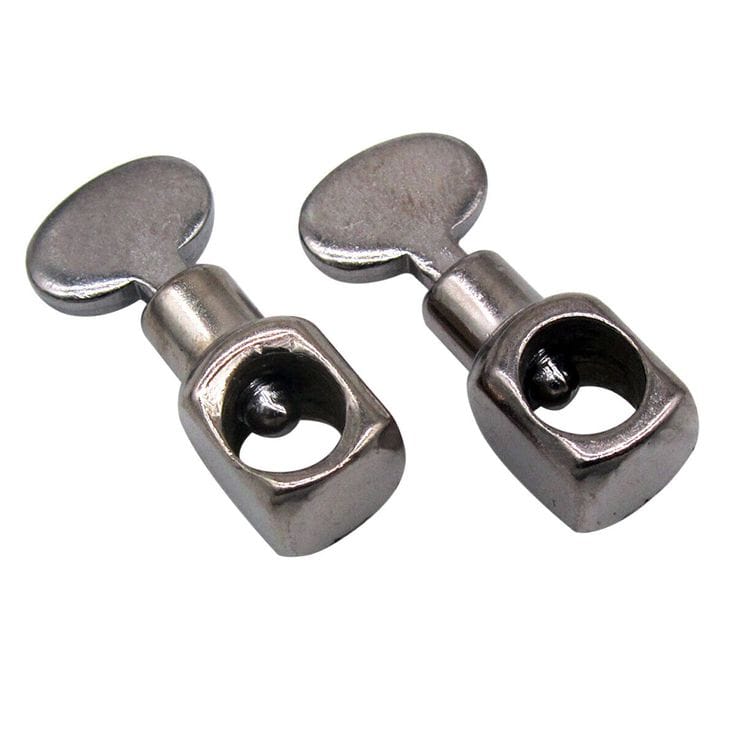
Needle Clamp |
Needle Clamp Also called: needle set screw All three types |
A small metal clamp with a screw that holds the needle firmly in the needle bar. You loosen this screw to change the needle, then tighten it calmly again before sewing. The needle should always be inserted as high as it will go, up to the stopper. | You will loosen and retighten this every time you install a fresh needle — which is in Phase 2 is the very first step. → Chapter 2 |
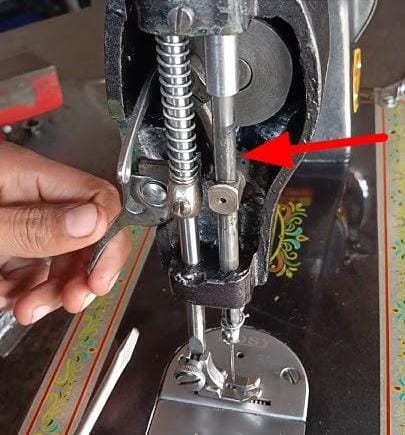
Needle Bar |
Needle Bar Moves the needle up and down All three types |
The vertical metal rod that moves up and down with every stitch, carrying the needle with it. It is one of the main friction points that requires oil during maintenance. | You will apply a drop of oil to the needle bar during the Phase 1 Reset and as part of the weekly routine. It is one of the key oiling points for domestic machines. → Chapters 2, 4 & 5 |
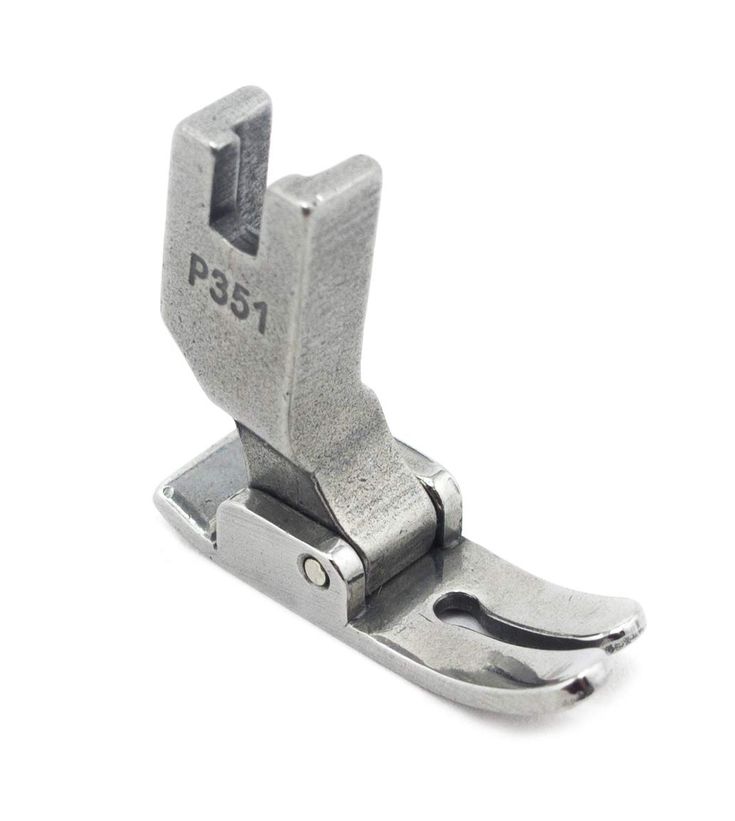
Presser Foot |
Presser Foot Must be raised before threading All three types |
The metal foot attached just below the needle. When lowered, it holds the fabric flat against the feed dogs so it feeds evenly. When raised, it releases the fabric — and this is the critical moment: it also opens the tension discs so thread can seat correctly. (tension discs is shown four columns away) | Raising the presser foot before threading is the single most important threading rule in this entire guide. Threading with the foot down is the number one cause of tension and thread-bunching problems. → Chapters 2 & 3 |
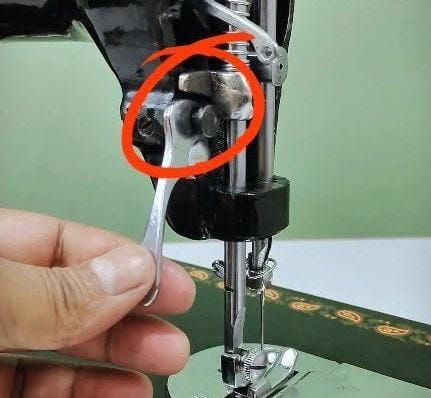
Presser Foot Lever |
Presser Foot Lever Also called: presser foot lifter All three types |
The lever at the back of the machine (usually behind the needle) that you push up to raise the presser foot and push down to lower it. Raising it lifts the presser foot and — crucially — opens the tension discs to allow correct threading. | You will use this every single time you thread the machine. Push it UP before you begin threading — always. → Chapters 2 & 3 |
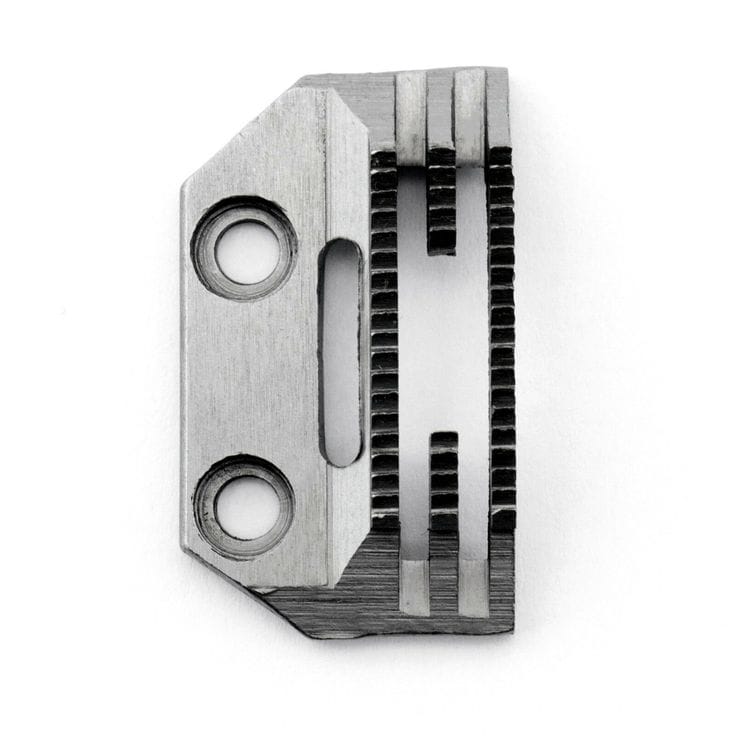
Feed Dogs |
Feed Dogs Also called: teeth All three types |
The small toothed metal teeth that sit beneath the needle plate and move the fabric forward, one stitch at a time. They rise and fall with each stitch to grip the fabric from below while the presser foot holds it from above. | Lint builds up here faster than anywhere else on the machine. A clogged feed dog is a leading cause of fabric-feeding problems. You will clear these in every Phase 1 Reset and every weekly routine. → Chapters 2 & 5 |
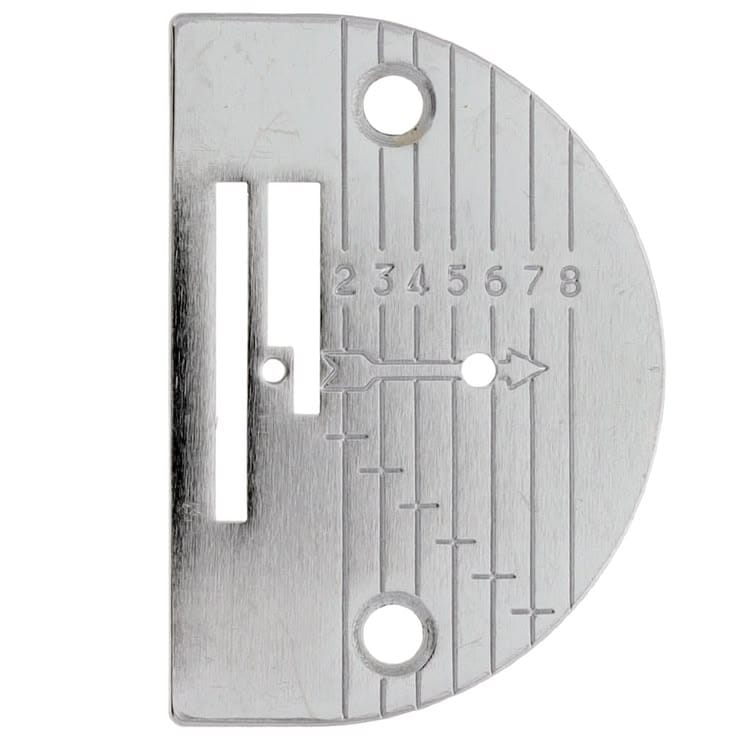
Needle Plate |
Needle Plate Also called: Throat Plate All three types |
The flat metal plate that sits on the machine bed directly under the needle. It has a small hole for the needle to pass through, and usually shows stitch-width guide lines. Removing it exposes the feed dogs and bobbin area for cleaning. | You will unscrew and remove this in Step 3 of the Phase 1 Reset, and again each week during the 5-minute routine. Lint hides here in large quantities. → Chapters 2 & 5 |
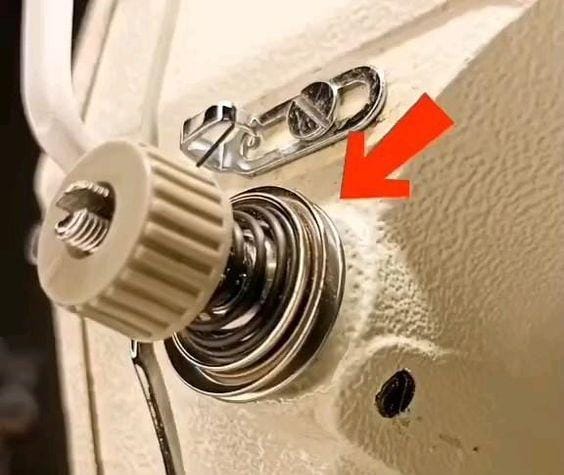
Tension Dial / Tension Discs |
Tension Discs Controlled by the Tension Dial All three types |
Internal metal discs inside the machine that grip the upper thread and create the correct tension for stitching. They are sometimes invisible from the outside but are controlled by the tension dial (knob) on the machine face. They only grip the thread correctly when the presser foot is lowered. | When the presser foot is DOWN and you try to thread the machine, the discs are closed and thread cannot seat correctly — this is the root cause of most tension problems. Understanding this changes everything. → Chapters 2 & 3 |
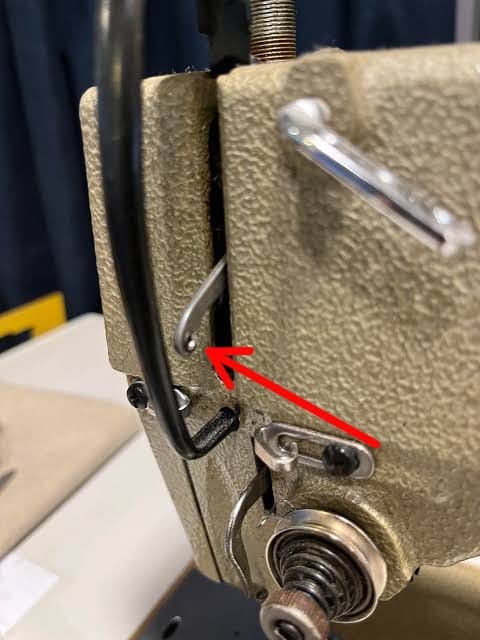
Take-Up Lever |
Take-Up Lever Also called: thread take-up All three types |
The moving arm on the front of the machine that rises and falls with each stitch, pulling the upper thread upward to complete each loop. Thread must pass through the small hole at the tip of this lever as part of the upper threading path — and it should be at its highest point when you begin threading. | Skipping the take-up lever during threading is one of the seven most common threading errors. It causes immediate sewing failure and severe thread bunching underneath the fabric. You will thread it in the correct order every time. → Chapters 2 & 3 |
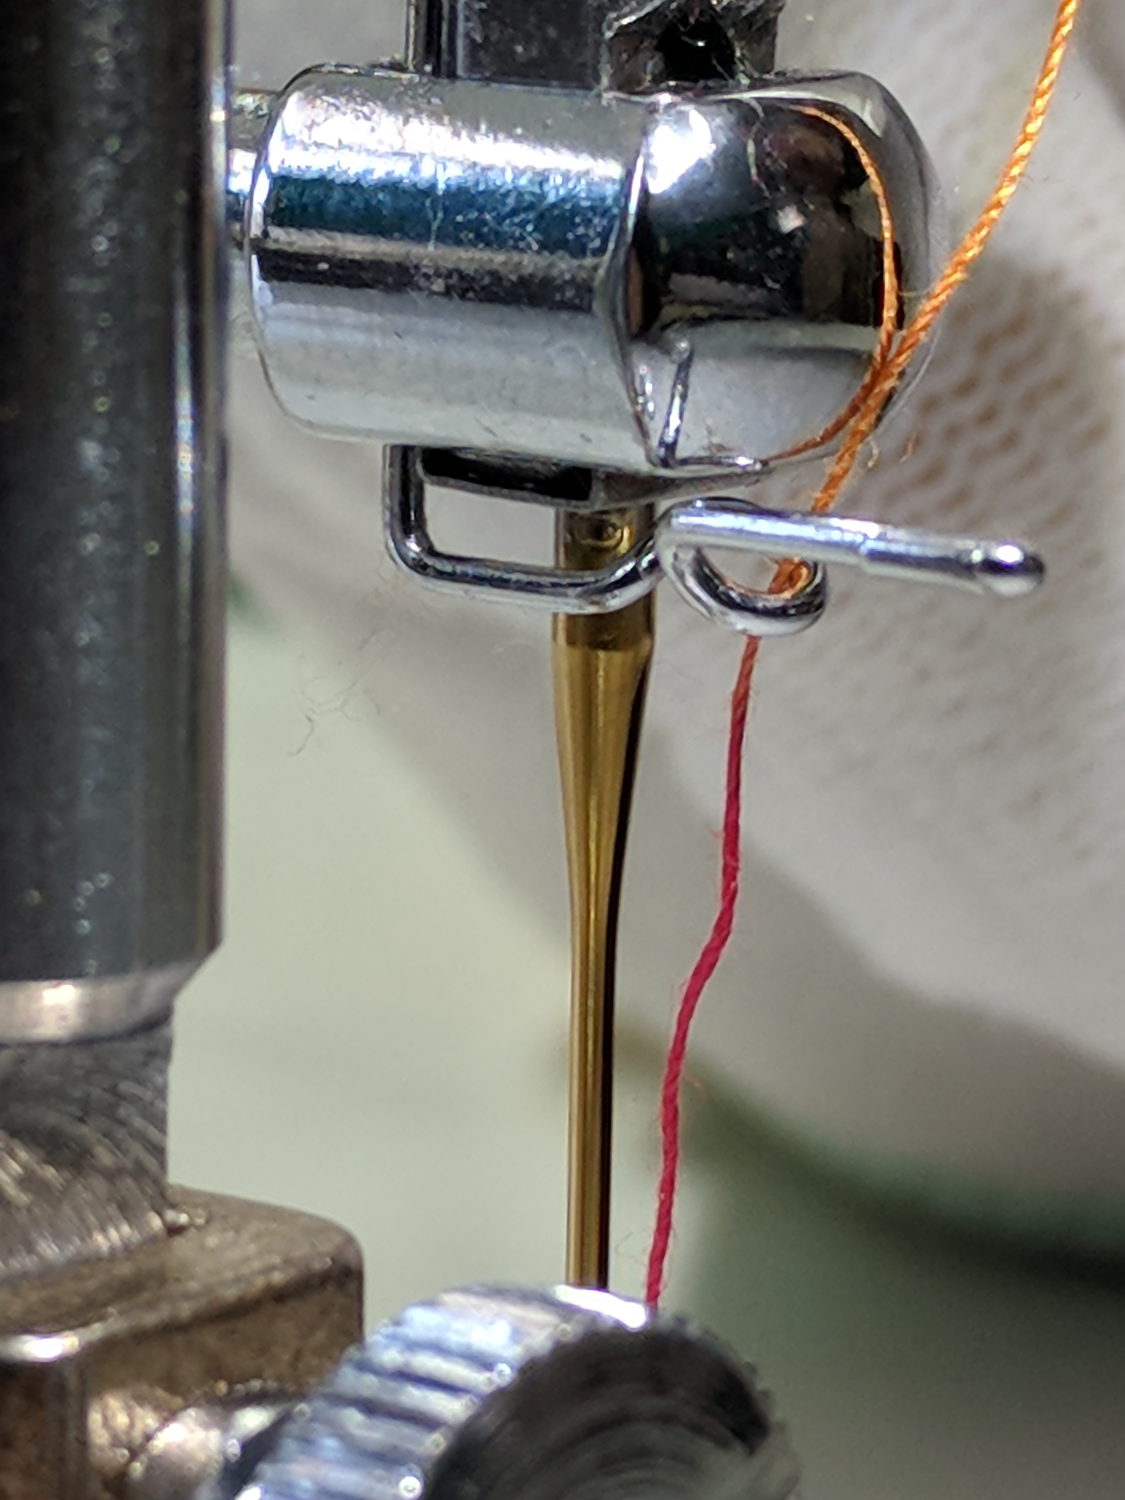
Thread Guides |
Thread Guides Need to be followed in the correct order All three types |
Small metal loops, hooks, or clips along the machine face and arm that direct the upper thread in the correct path from the spool to the needle. Each machine has them in a slightly different arrangement, but the threading diagram printed on the machine shows the exact order for yours. | Skipping one vital thread guide can put the thread on the wrong path, causing tension problems, breakage, and frustration. In the Re-threading Mastercheck, you will always thread through every guide from scratch. → Chapters 2 & 3 |
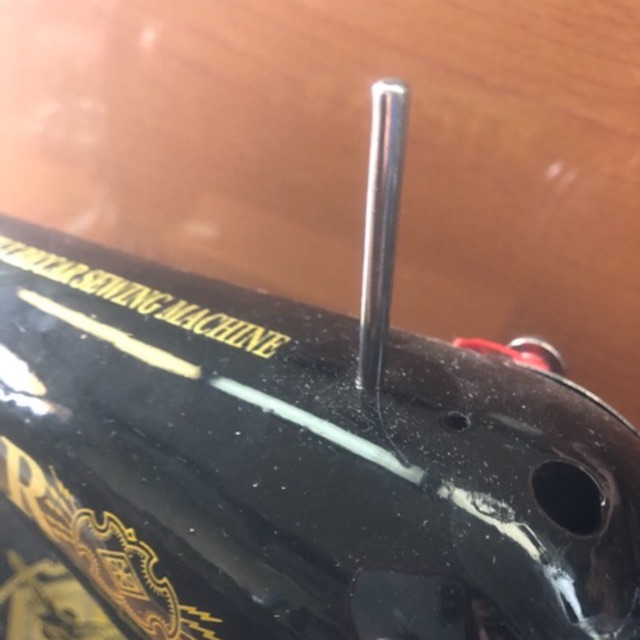
Spool Pin |
Spool Pin Starting point of the threading path All three types |
The upright or horizontal pin on the top of the machine where you place your reel of thread. Every threading path begins here — thread unwinds from the spool and flows through each guide in a specific order down to the needle. | Threading always begins at the spool pin. When you do a full rethread during the Mastercheck, this is your starting point. → Chapters 2 & 3 |
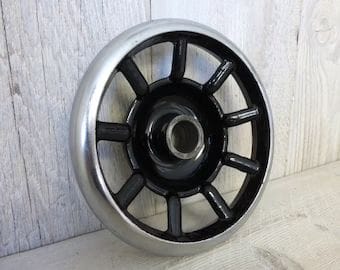
Handwheel |
Handwheel Also called: Balance Wheel All three types |
The large wheel on the right side of the machine. Turning it manually raises and lowers the needle, which is essential for starting stitches safely and for distributing oil after oiling. Always rotate it toward you (anti-clockwise when viewed from the right), and do the opposite for overlockers. | After every oiling, you will rotate this several times by hand to distribute the oil evenly before sewing. You will also use it to manually raise the needle before beginning a test stitch. → Chapters 2 & 4 |
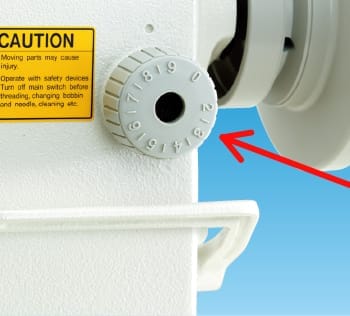
Stitch Length Control |
Stitch Length Control Lever (black head) or Dial (domestic electric) All three types |
The control that adjusts how far forward the feed dogs move the fabric with each stitch — which determines how long or short each stitch is. On black head treadle machines this is often a lever; on table tops and industrial machines, it is usually a numbered knob/dial. | You may adjust this when sewing thick fabrics like Ankara layers. A longer stitch helps the machine handle multiple fabric layers without struggling. → Chapters 3 & 8 |
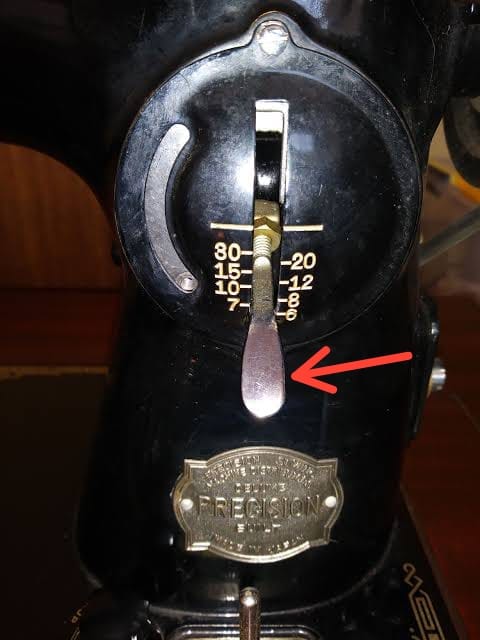
Reverse Lever |
Reverse Lever Also called: backstitch lever or button All three types |
The lever or button that makes the machine sew backwards. Used at the start and end of a seam to lock the stitches in place. On black head and industrial machines, this is typically a lever on the front face; on domestic electric machines it is usually a button. | Useful to know for context — and for table top users, to avoid accidentally pressing it while cleaning the machine face during the weekly routine. → Chapter 5 |
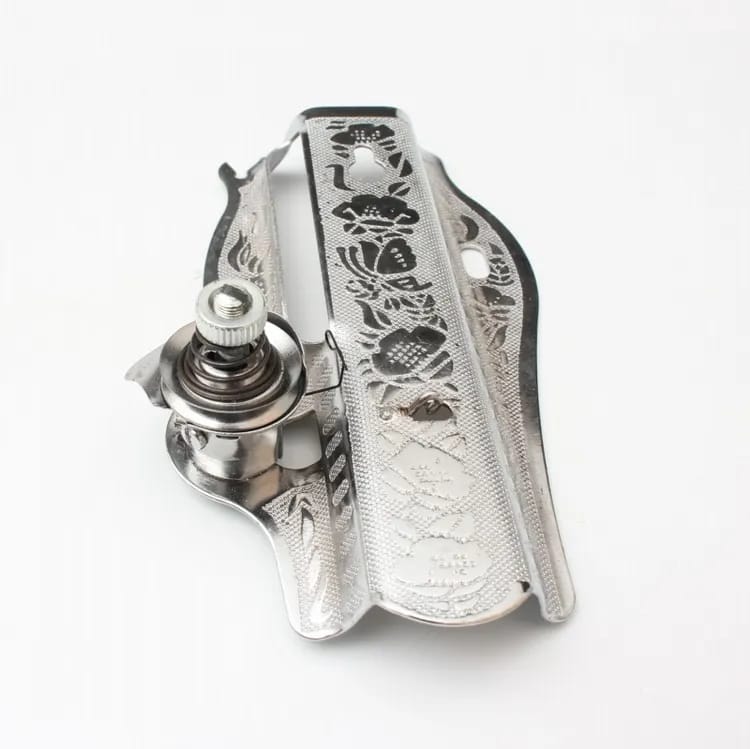
Face Plate |
Face Plate More prominent on black head machines Vintage & domestic |
The removable panel on the front face of the machine head. When removed, it reveals internal moving parts and additional oiling points. On black head treadle machines in particular, there are multiple oiling points visible behind this plate. | On black head machines especially, you may need to remove this to access oiling points in Chapter 4. The exact oiling map for your machine is usually printed inside the cover or in the manual. → Chapter 4 |
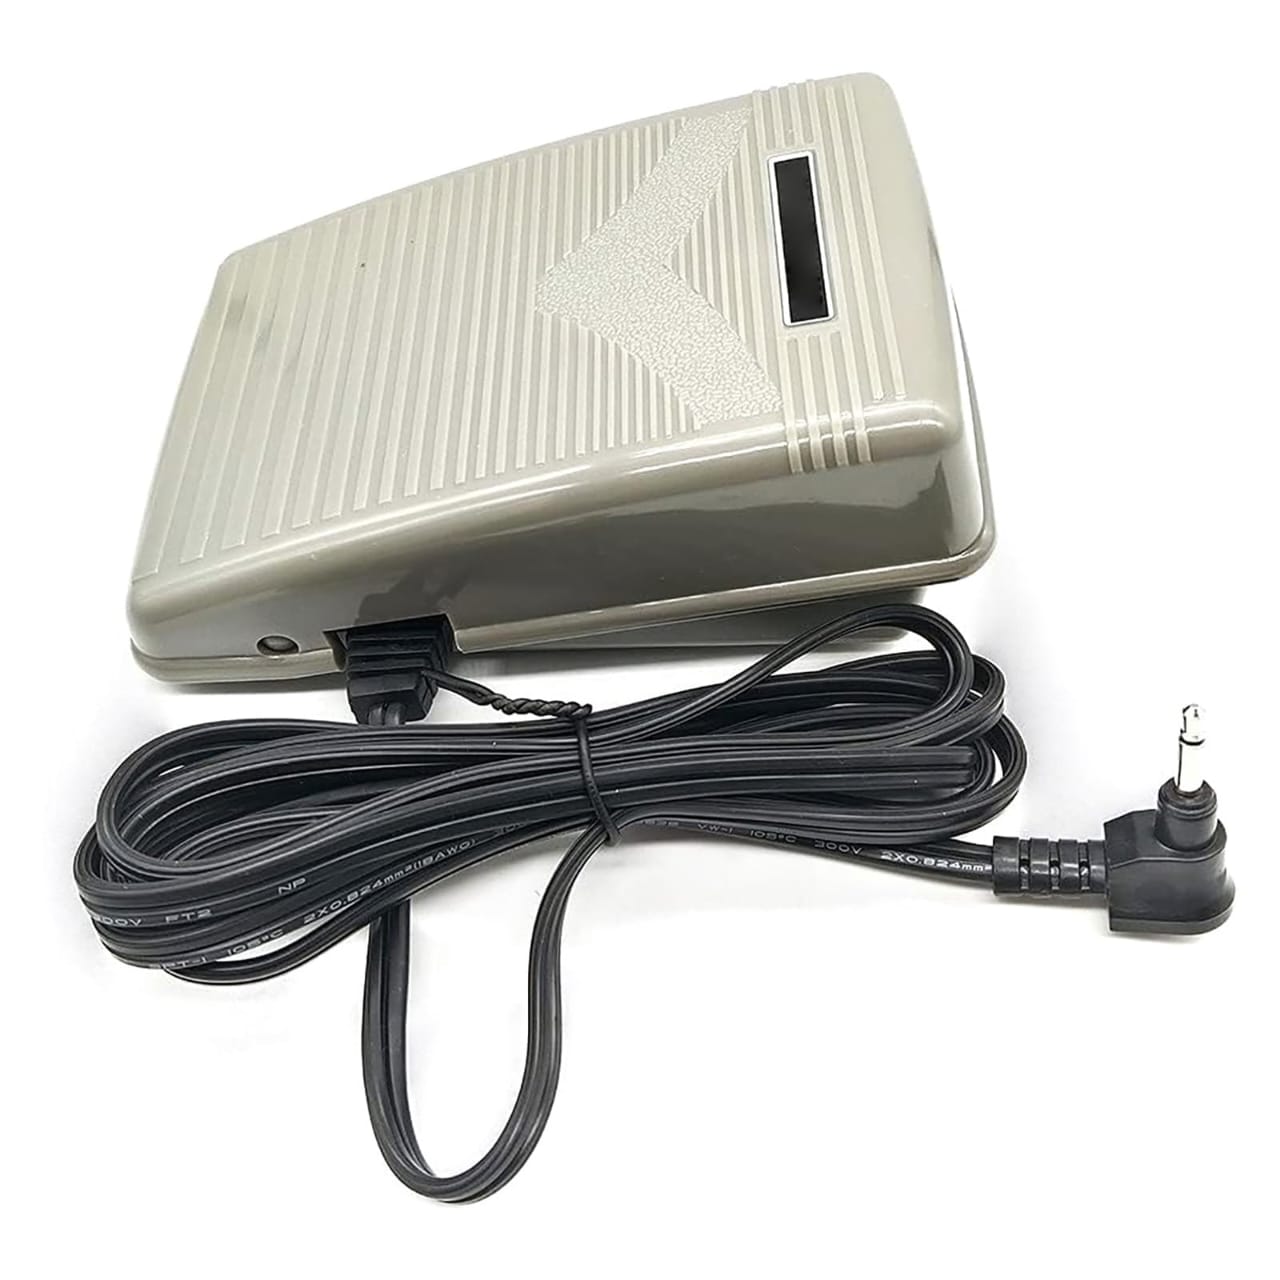
Foot Pedal |
Foot Pedal Not present on treadle machines unless you use an attached motor Domestic & industrial electric |
The floor pedal that controls the speed of the motor on electric domestic and industrial machines. Pressing it starts the machine; releasing it stops it. The treadle machine has no pedal — it is powered entirely by the foot treadle on the stand. | During all maintenance steps, electric machines must be switched off and unplugged — and you should step away from the pedal — before touching any part of the machine. This is a safety step in every chapter. → Chapters 2, 4 & 5 |
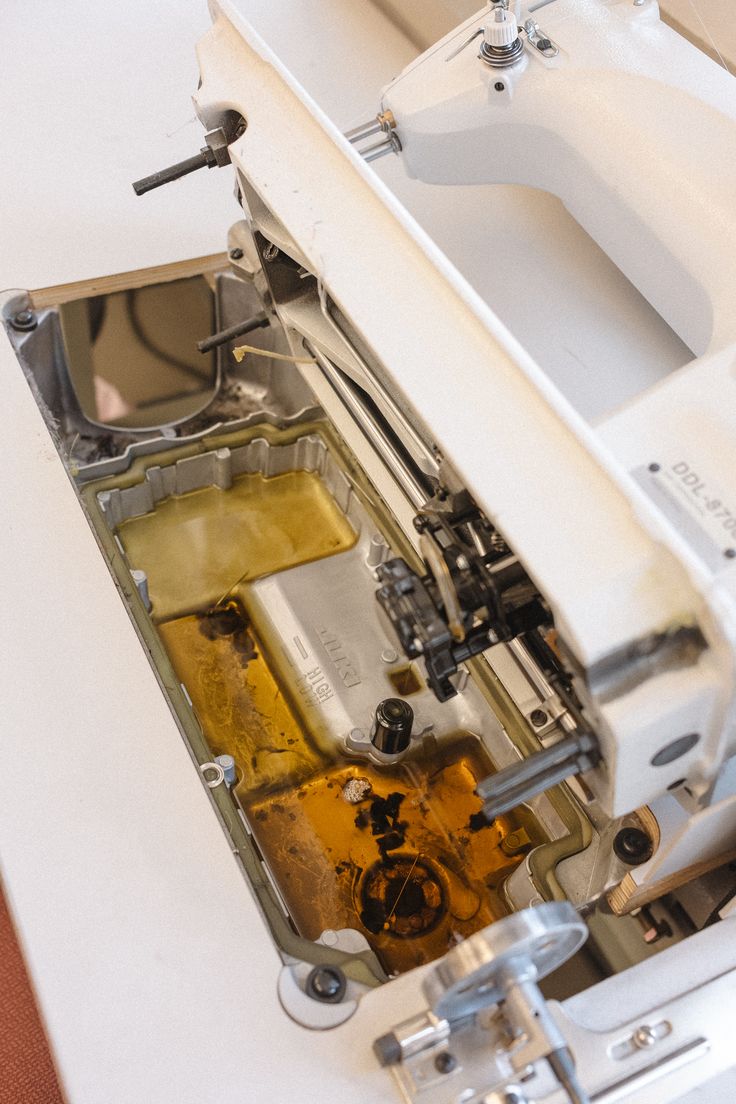
Oil Reservoir Window |
Oil Reservoir Industrial machines only Industrial only |
A basin located beneath the machine head that holds lubricating oil. Industrial machines lubricate themselves automatically from this reservoir — which is why they do not need manual internal oiling. It usually has a high/low mark that allows you to check the oil level at a glance. | If you own an industrial machine, this reservoir is the most important thing for you to check during maintenance. You will check and top up the level in Phase 1 Reset, Chapter 4, Chapter 5, and Chapter 6. → Chapters 2, 4, 5 & 6 |
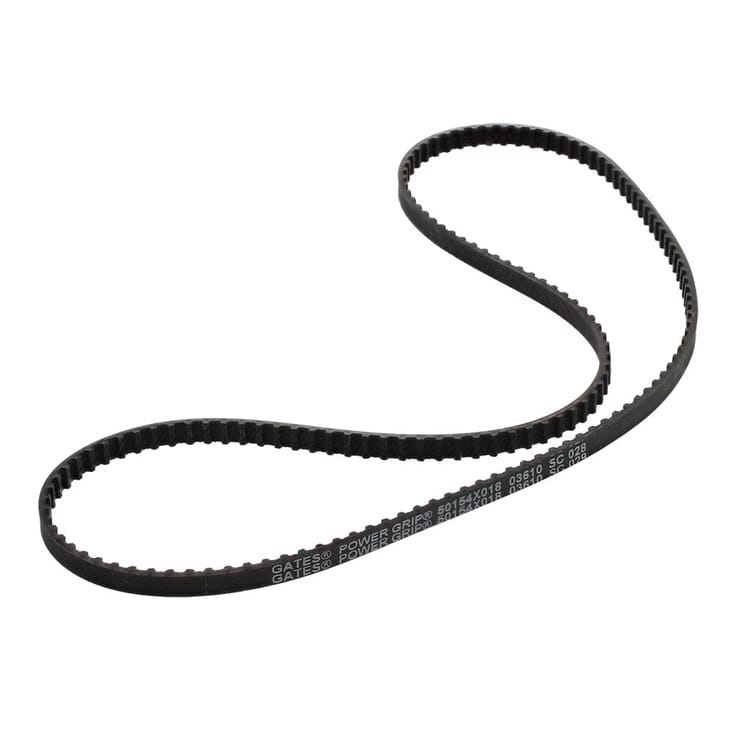
Drive Belt |
Belt Also called: drive belt Vintage, domestic electric & most industrial (except direct-drive) |
The rubber or leather belt that connects the motor to the handwheel on machines, or connects the treadle mechanism to the machine on black head treadle machines. It transfers power from the motor to the machine's moving parts. | A worn, frayed, or broken belt is one of the situations that requires a professional (particularly in table tops with built-in belts). → Chapter 7 |
✦ Remember This
Every sewing machine looks slightly different — but these key parts perform the same basic functions across vintage, domestic, and industrial straight-stitch machines. Whenever you come across a part name in a later chapter and you are not sure what it looks like, simply come back to this page. By Chapter 3, most of these names will already feel familiar. By Chapter 5, they will feel like second nature.